Showing posts with label snacks. Show all posts

Wednesday, February 15, 2017

Cupcake Club: February

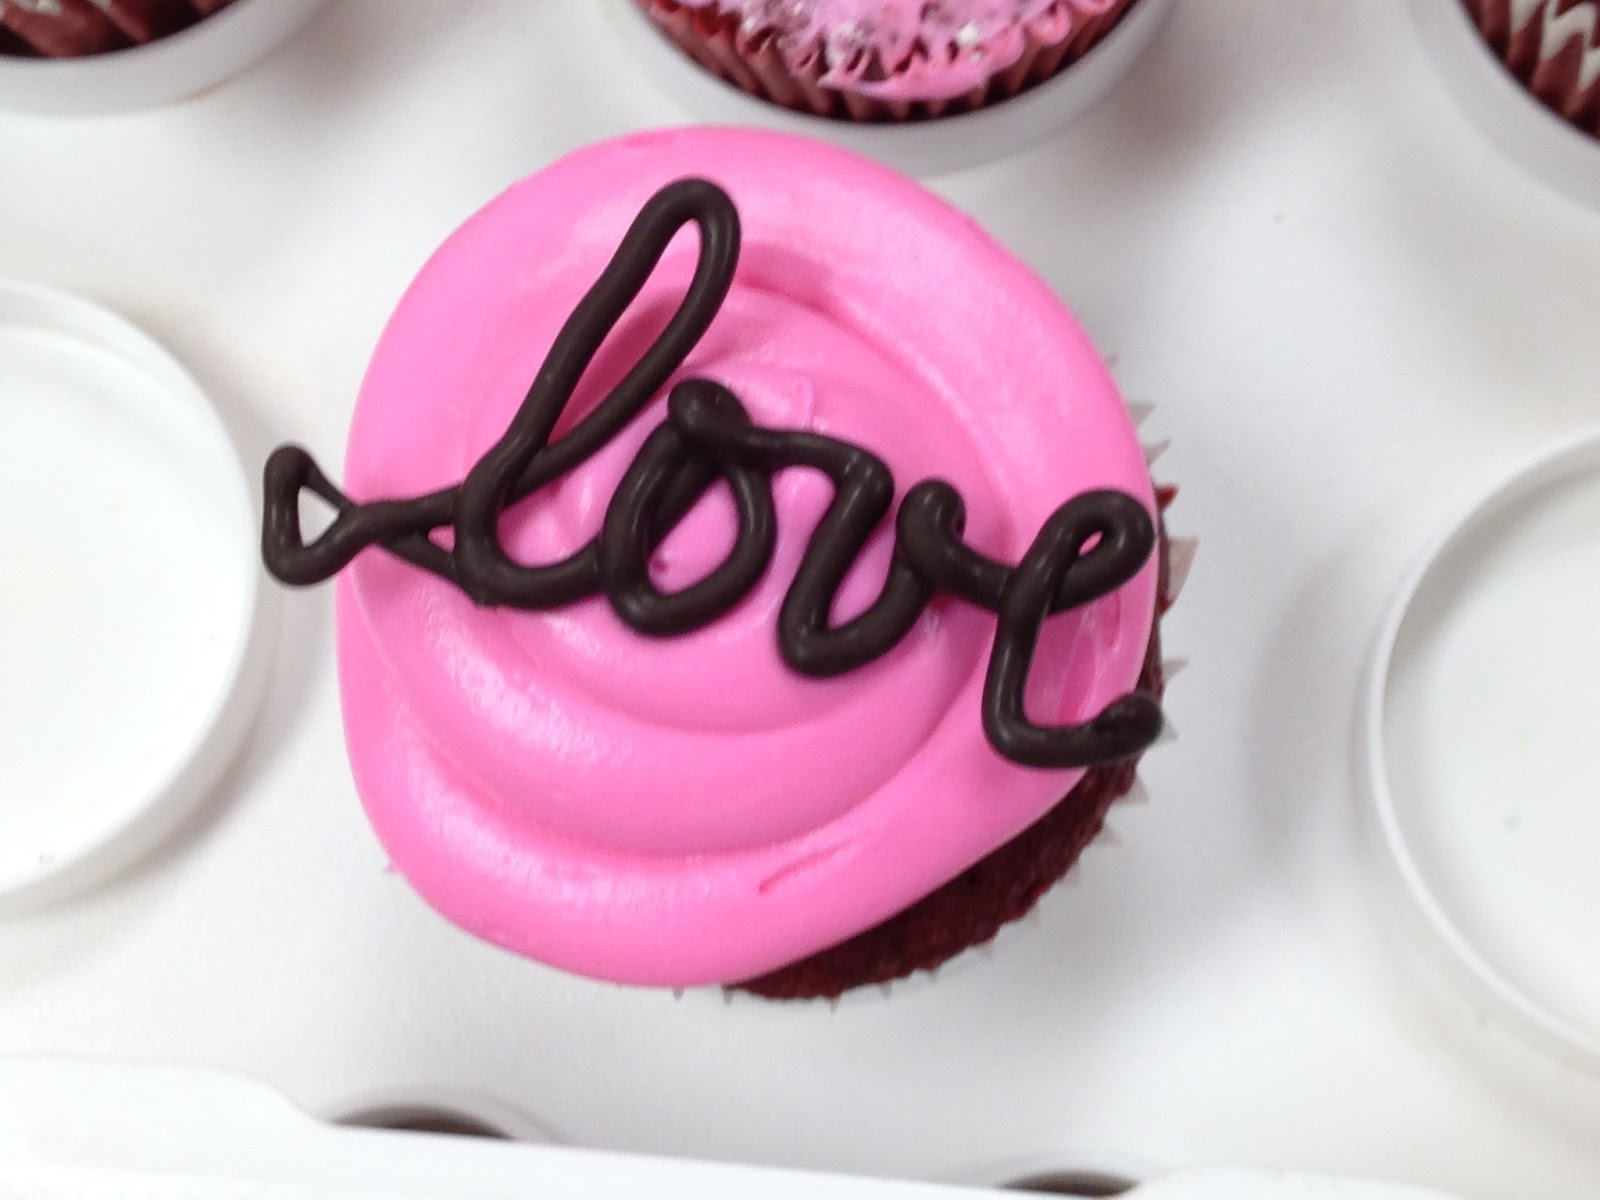
The February Cupcake Club meeting happened to fall on Valentine's Day.  We  baked red velvet cupcakes, and members decorated them with three different designs:

1.  Sweet Heart Cupcakes 
While I don't have a picture to share, there are beautiful examples provided in this link.  The kids were instructed to slice off the top of the cupcake.  They set it on a piece of wax paper at the work station.  We didn't have heart-shaped cookie cutters in the right size, so the kids used a knife to cut a small heart from the center of the top. After discarding (or eating) the heart, they dusted the top with powdered sugar.  They were then asked to spread frosting on the cupcake (the cake in the paper liner) before replacing the top on the cupcake.  Once the cupcake had been reassembled, the pink frosting peeked through the heart.

2.  For the second cupcake, they spread cream cheese frosting on the top and used Wilton sugar hearts in various shades of pink as decorations.  Pretty and simple.

3.  Love Cupcakes 
Prior to the meeting, I melted a bag of dark chocolate candy melts in the microwave.  Once smooth and creamy, I poured the melted candy into a piping bag that was fitted with a small round piping tip.  (Caution: bag was quite warm, and the candy dripped from the tip).  I wrote the word love on a sheet of wax paper I had taped to the kitchen counter.  I then drew hearts and drizzled chocolate through the center. 


If you wish to create beautiful filigree hearts, I would suggest you follow the instructions provided by Martha Stewart here

Before heading over to the school, I filled three piping bags with cream cheese frosting I had tinted pink.  Club members used large round, closed star, and open star tips (Wilton piping tips 2D and 1M) to frost these cupcakes before adding the chocolate embellishments. The Club's faculty advisor and I were impressed with the improvement in their skills!


During each meeting, the kids get to enjoy a cupcake, and they donate the rest.  Last month, one parent suggested we recognize the school district's bus drivers.  After the classroom had been cleaned up, we walked across the parking lot to the bus garage and delivered two trays of holiday cupcakes.  The gesture was greatly appreciated, and I thank Emily for the wonderful idea!

Monday, June 8, 2015

DIY VBS for Families

Do It Yourself Vacation Bible School.  A curious concept, right?  When our daughters were younger, I was interested in registering them for Vacation Bible School near our home.  Since they were of preschool age, I was looking for a program that would allow me to volunteer with the kids.  I found that most of the churches in our area of town offered summer Bible programs for children entering 1st through 6th grades.  I resigned to the fact that our girls would have to wait a few years before being old enough to attend a formal VBS.  Pushing aside my discouragement, I decided to plan a few lessons for the girls on my own.  

I turned to the internet for lesson ideas, and I came across some websites that offered free lesson plans.  To be honest, this took place six years ago...I believe I referred to the DLTK's Growing Together website, possibly the VBS page.  I also found a lesson called "Consider the Ants" on a website called Danielle's Place.  In this post, I will provide plans for the two lessons that were included in our DIY VBS.  I will also include an additional lesson that came to my mind as I was writing this post.

LESSON 1--CONSIDER THE ANTS (adapted from the lesson written by Carolyn Warvel as cited above). 
Bible VersesProverbs 6: 6-8 
"Go to the ant...consider her ways, and be wise.  Without having any chief, officer, or ruler, she prepares her bread in summer and gathers her food in harvest."
Galatians 6:9
"Let us not become weary in doing good, for at the proper time we will reap a harvest if we do not give up."
Alphabet Activity:  Practice writing the word ant in uppercase and lowercase letters. 


Craft:  Make fingerprint ants.  May use markers, stamp pads, or washable paint.  Once the fingerprint ants are dry, the kids can continue to decorate the page.  Adding googly eyes make the ants looks really cute.


Snack:   Ants on a log.  Spread peanut butter or cream cheese on celery.  Top with raisins or dried cranberries.


Lesson:   Though Carolyn Warvel's lesson is free, it is copyrighted.  Please refer to Danielle's Place to view the script for this lesson or to find additional ideas to incorporate into your own plans.  During our lesson, we happened to discover some ants on our patio that were hard at work.  This real-life example reinforced the lesson for our girls.


LESSON 2--DANIEL IN THE LION'S DEN
Bible Story:  I read the story of Daniel in the Lion's Den from The Beginner's Bible: Timeless Children's Stories.  Our kids have read this Bible so many times the book's binding needs to be repaired.  Now that they're a little older, they prefer to read The Jesus Storybook Bible: Every Story Whispers His Name.  According to Amazon, both Bibles are geared toward children ages 4 to 8, but the Beginner's Bible is intended for readers ages 6 and under.  While both Bibles contain illustrations, The Jesus Storybook Bible has considerably more text than The Beginner's Bible.  Our girls have loved both Bibles because the stories are well-written in a language they can understand. 

Bible Verses:  Daniel 6:16
"So the king gave the order, and they brought Daniel and threw him into the lions' den. The king said to Daniel, "May your God, whom you serve continually, rescue you!"
Daniel 6:22
"My God sent his angel, and he shut the mouths of the lions. They have not hurt me, because I was found innocent in his sight. Nor have I ever done any wrong before you, Your Majesty."
Alphabet Activity:  Practice writing the word lion in uppercase and lowercase letters.

Craft:  Paper Bag Lion.  At the time I was preparing this lesson, I had come across a Martha Stewart paper bag lion craft kit.  I was unable find this kit online, so there is not a link available to share.  However, I did find instructions for a similar craft on Martha Stewart's website.  Find additional ideas for lion crafts on Pinterest.  


Snack:  English muffin lion.  Toast an English muffin and spread with peanut butter or substitute with a nut-free alternative.  Make eyes with raisins or dried cranberries.  Dab a small amount of jelly in the center for a nose.  Sprinkle corn flakes around the edge of the English muffin for the lion's mane.  This tasty treat was a huge hit with my young daughters!


Lesson:   The story of Daniel in the Lion's Den can be found in both of the children's Bibles mentioned earlier and on the DLTK website.  Age-appropriate discussion questions and a Bible verse are also included in this link to the DLTK website.

LESSON 3:  Trees of Life

Bible Verses:  Jeremiah 17: 7-8
"Blessed is the man who trusts in the Lord and whose trust is the Lord. They will be like a tree planted by the water that sends out its roots by the stream. It does not fear when heat comes; its leaves are always green. It has no worries in a year of drought and never fails to bear fruit."
Jeremiah 29:11
"For I know the plans I have for you,” declares the Lord, “plans to prosper you and not to harm you, plans to give you hope and a future."
Read (this story is the lesson):  The Tale of Three Trees by Angela Elwell Hunt.  In this touching story, the reader discovers the hopes and dreams of three trees that stand together on a hillside.  As we follow these trees over time, we learn that their fate is much different than they had expected.  While the future was not what they had anticipated, we learn that their purpose in life was much more beautiful than they could have ever imagined. 

Alphabet Activity:  Practice writing the word tree in uppercase and lowercase letters.

Craft:  Tissue Paper Trees.  As first-year Daisy Girl Scouts, the girls in our troop made these tissue paper trees.  The day's lesson was "making the world a better place," and the girls were working toward the rose petal in the Daisy petal set.  Since this meeting took place in the fall, we used warm-colored tissue paper.  If doing this craft in the spring, use green tissue paper for the leaves and pink tissue paper for flowers.  If it's late summer or early fall, use green tissue paper for leaves and red tissue paper for apples. To make the trunk of the tree, the children traced one of their hands on brown construction paper.  They cut out the trunk before gluing it on another piece of construction paper.  Our kindergartners showed us where they wanted their leaves to be on the paper, and we helped them with this craft by applying dots of glue for them.  A glue stick could work as well, but if you use a bottle of glue, you'll want to keep your hands on it.  Believe me!

Snack:  I've heard many parents and children refer to broccoli as "green trees."  For a snack that sticks to the theme of this lesson, serve broccoli with ranch dressing.  While bumping around online, I came across another healthy alternative--here's a tree snack with pretzels and grapes that kids can create on their own.

Though this blog was initially created as an additional resource for Girl Scout troop leaders, it occurred to me that other families and childcare providers may be interested in replicating the activities I have prepared for my daughters.  I decided to share our experiences here.  If you are interested in learning how Girl Scout troops could potentially incorporate the idea of a DIY VBS into their Bronze Award plans, please contact me by leaving your email address in the comment section below.  As always, thank you for reading!

Tuesday, May 12, 2015

Brookies

Our daughters get older, and there is an increase in the amount of chicken scratch covering the calendar that hangs on our refrigerator.  By color-coding this scrawl for each family member, my husband and I are able to successfully manage the chaos (though some days it doesn't feel like we're as efficient as we'd like to be).  I imagine this time of year is particularly crazy for most families as we gear up for summer break and the associated change in family rhythm and routine.  In previous posts, I shared some gifts that we make to give our daughters' teachers for Christmas and at the end of the school year.  One of the gifts is homemade bread with a cute tag made by the student.  My daughters and I love to bake.  I've let them help me in the kitchen since they were really young.  Most times we bake from scratch, but there are other times when we choose to use prepackaged ingredients.  Using measuring cups and spoons has been a great way for the girls to practice and improve their math skills without even knowing it.
Several years ago, I was introduced to the Brookie, an irresistable combination of brownies and chocolate chip cookies.  With just one bite, I was instantly hooked.  And then I learned how to make them... Brookies quickly became a family favorite!  Our older daughter's name is Brooke, so she thinks it's fun to take Brookies to her classmates for her birthday, and she gives Brookies as gifts during the holidays.

Every time we make Brookies, people ask me for the recipe.  As I mentioned earlier in this post, we usually bake from scratch, but when we make Brookies, it is much easier and quicker to use prepackaged ingredients.  So instead of a recipe, I have rather a list of instructions.  After searching online for a link of instructions to share in this post, I discovered there isn't a website out there that describes how to make Brookies like we do.  We have made this sweet treat many times, and my girls (ages 9 and 8) can now make it all on their own.  Of course, I'm always there to supervise the use of the hand mixer and oven.  After a great deal of trial and error, here are some tips for baking the perfect Brookies:
  • Purchase a box of Betty Crocker Triple Chunk Brownie mix and a tube of Pillsbury refrigerated chocolate chip cookie dough.  By choosing a different variety of cookie dough (peanut butter or sugar cookie, for example) and adding various toppings (chocolate chips, crushed peppermint candy, etc), the options are endless.  That being said, these two products have yielded the best results for us.
  • Spray an 8"x8" glass pan with cooking spray. (While we prefer to use a glass pan, please note that any oven-safe pan can be used).
  • Preheat the oven as directed on the box of brownie mix.  If using the mix mentioned above, and if using a glass pan, the oven should be set to 325 degrees.
  • Set the unopened tube of cookie dough on the kitchen counter to soften.
  • Prepare the brownie mix as directed.  For this specific brownie mix, combine 1/4 cup of water, 1/3 cup of vegetable oil, and 1 egg in a medium bowl.  
  • Stir until well blended.
  • Pour batter into the prepared baking dish.
  • Bake as listed on box.  If using the mix mentioned above, the recommended time is 35-38 minutes.  We usually leave the brownies in the oven for 38 minutes.  A shorter baking time has yielded a really gooey brownie layer in the finished product. Keep an eye on them so they do not bake too long.  
  •  Remove brownies from oven and increase the oven temperature to 350 degrees (as directed on the tube of cookie dough).
  • Using a spatula, spread the softened cookie dough over the warm brownies.  
  • Bake for 10-11 minutes or until the edges are lightly brown.  Remember the cookie dough will continue to bake as it's cooling.  The edges shouldn't be too dark when removed from the oven, but the middle of the cookie dough layer shouldn't be raw either.
  • Let cool completely before cutting.  
  • When my daughter is taking the Brookies to her classmates at school, I cut the 8x8 pan into 25 pieces.  If we're serving Brookies for dessert or giving them as gifts, I may cut them into 16 larger pieces.  
 
  • I set each Brookie on a flattened cupcake liner.  Mini cupcake liners are a good size when the pan has been cut into 25 pieces.  Most kids can devour it in three or four bites.  It's the perfect little treat to satisfy a craving!  But be warned...most people can't eat just one!

Place a couple Brookies in a snack-sized zippie bag or slide them into a treat bag and tie with a pretty ribbon.  In my experience, the Brookie is out of the wrapper and gone before the packaging is even noticed.  

For Girl Scout troop leaders, help your girls satisfy a step for the Brownie Snacks badge or the Juniors Simple Meals badge by baking Brookies with them.  While the Brookies are in the oven, the girls can work on other badge steps.  Have fun!  Thank you for reading!

UPDATE (October 2015):  
I volunteered to make a treat for my daughter's Halloween party at school.  She asked for Brookies with a twist.  We decided to drizzle white chocolate over the top once they had baked and completely cooled.  We wanted to cut this batch into a dozen pieces, so we gently pressed a mellowcream pumpkin in the center of each piece.  After letting the white chocolate set briefly, we cut the pieces and placed them in orange cupcake liners.  NOTE:  The traditional Brookie as prepared with the ingredients described above is nut-free, but individuals with certain food allergies may wish to avoid this Halloween treat.  I used a bar of Ghiradelli white chocolate for the drizzle.  The package stated the bar may contain tree nuts, and the Brach's pumpkins were manufactured in a facility where milk, eggs, tree nuts, peanuts, wheat, and soy are used in the production of other products.  

Friday, May 1, 2015

Mother's Day Tea and Traditions


When I think about celebrating Mother's Day, the first ideas that come to mind are tea parties and flowers.  Every Mother's Day since becoming a mother myself, we have invited my parents and my in-laws to our house for a special dinner.  In 2009, my mother-in-law asked if we could have a special Garden Fairy Party before the annual dinner.  We immediately starting planning the day, knowing that we spend the majority of our time together planting annuals in the flower beds in front of our house.

a craft for the Brownie Bugs badge
In preparation for the "Butterfly Bash," my daughters helped make pipe cleaner butterflies to be used as decorations.  This is a relatively easy and inexpensive craft that can be modified for kids of all ages.  I believe I may have loosely followed the directions posted hereMy girls were only 2 and 3 years old at the time, so they needed some help with this craft.  They enjoyed experimenting with different color combinations of pipe cleaners the most.  To make the butterfly your own, you can use beads and pom poms, brightly colored pipe cleaners, sparkly pipe cleaners...Many different variations of these butterflies can be found on Pinterest.  The girls also made invitations for their grandparents by drawing butterflies on construction paper and decorating them with markers and glitter glue.

We wanted to serve a light lunch before getting our hands dirty, so my girls helped make finger sandwiches.  Using a butterfly cookie cutter, my older daughter cut the bread.  We spread some with peanut butter and jelly, and others we filled with bacon, cucumber slices, and ranch-flavored cream cheese.  I also made Ina Garten's Cheddar-Dill Scones; however, I used minced rosemary and diced thyme instead of dill.  Again, we used the butterfly cookie cutter when cutting the dough.  The scones were spread with a prepackaged herbed cream cheese.  We also served a fruit salad and pink lemonade--two favorites at our house!
consider for Brownie Bugs and Snacks badges


For dessert, we made butterfly cupcakes using my mother-in-law's favorite Jello Poke Cake recipe.  To make the butterfly, I combined several different ideas I found online.  A quick Pinterest search provides plenty of inspiration.  To make the wings, cut a large marshmallow in half and dip in sanding sugar.  Use pastel-colored M&Ms for the body and a gumdrop for the head. 
Daisies can practice being friendly and helpful.


Even when my daughters were much younger, they were able to help properly set the table.  For the "Butterfly Bash," I made simple place cards to set at each seat.  We cut flowers from our yard for the table centerpiece.  

When planning a tea party with Junior Girl Scouts, they can complete the five steps to earn the Social Butterfly badge.  Daisy Girl Scouts can earn the orange petal for being responsible for what I say and do.  They can also earn the yellow petal for being friendly and helpful.

After looking back through pictures in our family scrapbook, I now recall that I helped our girls make special booklets to give to their grandmas during this tea party.  I asked questions such as "What is your favorite thing to do with Grandma?" and "What is your favorite memory with Grandma?"...  I recorded the girls' answers, ending the message with "I love you."  We helped the girls "sign" their names.  Note:  If school-aged children are making this gift, they could fill in the blanks with their answers.  For example, "My favorite thing to do with Grandma is _____________."  These kids may be able to write the questions and responses on their own.  It would be cool to have kids write on a pretty piece of paper from the craft store and put it in a frame for Mom or Grandma.  They could update their responses for future Mother's Day gifts. 

In addition to the booklets, we made butterfly suncatchers for the grandmas.  There are several different varieties available.  In my experience, painting suncatchers is easier for younger kids than decorating suncatchers with baking crystals.  Our family has used both, and we've been pleased with the results.  I would recommend painting suncatchers when when working with Daisy and Brownie troops.  Junior Girl Scout troops may have success filling the spaces of the suncatcher with the baking crystals, but I suggest having additional volunteers available to help.  Depending on the size of your troop, you may consider purchasing additional glass stain paint so the girls aren't all trying to share the same eight pots of paint.  Keeping with the butterfly theme, a mosaic butterfly stepping stone is another great Mother's Day gift idea.  We have helped our daughters make a few stepping stones over the years, but this is not a project I would tackle with our Girl Scout troop regardless of their ages.

When the girls in our troop were in kindergarten, we held a Thinking Day Tea.  When the older girls were Brownies, we had a Mother's Day Tea.  For this occasion, the girls in our troop invited their mothers to a tea party that we scheduled for late afternoon on a weekday in early May.  Badge steps and service projects are usually tied into our events, but this time we planned to give the guests an opportunity to socialize with each other.  Each family was asked to bring something to share whether it be a sweet treat, a savory snack, beverages, or paper products.  An email was sent and the ladies were asked to "Reply All" when they signed up to bring something.  As I mentioned earlier, this is great way for Junior Girl Scouts to earn their Social Butterfly badge.  Brownies can satisfy steps toward the Snacks badge, and Daisies can earn some petals.  It was a super easy event for the leaders and a lot of fun for everyone! 

Just a couple months after that Garden Fairy Party, my mother-in-law Nancy was diagnosed with a very rare and aggressive form of brain cancer.  She fought to the end but lost her heartbreaking battle on April 1, 2011.  Since her passing, Mother's Day has become even more special for our family.  Every May, a few days before the holiday, my husband and I take our girls to a local nursery to buy brightly colored blooms.  We spend Mother's Day planting flowers and mulching the beds, celebrating Nancy's life by taking plenty of time share our favorite memories of her.  Happy Mother's Day!  Thank you for reading.

    "The grass withers, the flower fades,
        but the word of our God will stand forever."

                                                     Isaiah 40:8

Wednesday, February 11, 2015

Valentine's Day Party Ideas for Your Troop or the Classroom

I have two daughters--one is in fourth grade, and the other is in second grade.  Over the years, I have served as a Room Mother for their class parties.  I have volunteered as part of a team of Room Parents.  Most recently, I have stepped aside to let other parents join in the fun.  It's safe to say, I've seen classroom parties handled many different ways.  Money may be collected in a lump sum at the beginning of the year.  Requests for monetary donations may occur on a party-to-party basis throughout the year.  Sign-up sheets may be displayed, asking for party treats and supplies to be donated by families.  Parties may be planned months in advance.  Parties may be planned several days ahead.  Regardless, in my experience, the kids have fun.  This has also proven to be true with our Girl Scout troop parties.  While we have never celebrated Valentine's Day together as a troop, I thought I would share some of my favorite Valentine's Day party ideas that worked well in the classroom.  Maybe your Girl Scouts would enjoy including them at their next Valentine's Day event?

Craft:  Paper Plate Valentine's Day Card Holder. We first made these card holders with my daughter's preschool class.  Instead of punching holes in the edge of the paper plates and using yarn to sew them together, we used staples.  The kids decorated the plates with markers, crayons, and stickers.  We used yarn in place of the ribbon in order to hang the card holder on the back of a chair.  Unfortunately I do not have my own picture to share with you.  As the kids get older, they can sew the plates together using yarn or ribbon.  Maybe they could use paint and construction paper to make animal paper plate card holders

My mom is a retired fifth grade teacher.  When our girls were little, I would take them to her school during the Valentine's Day party.  She would ask her students to decorate a Valentine card box at home.  The Room Parents, another teacher, and I would get to judge whose box was the cutest, funniest, prettiest, and most creative.  This could be a fun activity to try with your Girl Scouts.  Have them decorate a tissue box at home and then bring it to the meeting or troop Valentine's Day party.  Allow the girls to vote for different categories, and do not allow them to vote for their own box.  Maybe the winners could receive a small prize or simply a congratulations from the other girls in the troop? 

Craft:  Cupig Candy Dish.  

  
Supplies needed:
  • 4" terracotta flowerpot
  • pink paint and paintbrush
  • 1 pink pipe cleaner
  • 2 googly eyes
  • 1 foam heart sticker
  • glue (Elmer's, Tacky, and hot glue?)
  • red or pink shredded paper


 Directions:
  • Apply two coats of paint to flowerpot.  (Acrylic paint dries rather quickly).
  • Curl pipe cleaner around a pencil.
  •  Use glue to attach tail.  (I found tacky glue worked better than Elmer's glue, but having a hot glue gun on hand may be helpful).
  • Use glue to attach googly eyes.  
  • Use a black Sharpie to make two dots for nostrils.
  • Peel the back off the heart sticker and attach the snout beneath the eyes.
  • Fill the flowerpot with shredded paper.
  • Add candy (like conversation hearts or individually-wrapped chocolates).


Game:  Pin the Tail on Cupig.   
Years ago, I drew a picture of a pig on a piece of poster board, and I added large googly eyesI used my Cricut or my Creative Memories Circle Cutter to cut 1" circles out of pink cardstock, and I made sure to have two circles per player.  For each child, I curled a pink pipe cleaner around my little finger and used a glue stick to sandwich the pipe cleaner between two of the circles.  I also prepared a construction paper mask for each child.  I free-handed masks on dark construction paper.  After cutting them out, I punched a hole in each side of the masks, using a standard hole punch.  I added two pieces of yarn to each mask to make it easy to put on as each child prepared for his or her turn.  During the party, we wrapped a piece of tape and stuck it to the back of the circle.  To make this game more challenging for older players, pair the kids up with a partner.  Set up a small obstacle like placing a chair between the kids and the pig.  One player is blindfolded and the other has to provide verbal cues to guide the partner around the chair and toward the pig.  Here are some photos of the materials:

Update:  I have the Cricut Personal Electronic Cutter, and I love it!  We have used it to embellish scrapbook pages and cut out titles for our pages.  We have used it to make various signs (Star of the Week, Welcome Home, team signs, and signs for Cookie Booths).  We have saved a great deal of time using the Cricut to cut out shapes for class party and birthday games.  This older model meets my current needs, so I'm not in the market for a new one.  That being said, Amazon offers a wireless version of this cutting machine According to the reviews, it is worth checking out!

Game:  Find Your Match.   
This game is a variation of the Guess Me Icebreaker Game that we played during our troop Christmas Party in 2013I love this game because it is inexpensive and requires little, if any, preparation.  It's similar to HedBanz in the sense that a piece of paper labeled with the name of a well-known character or person is pinned to the back of each participant.  Players walk around the room, asking other players "yes" or "no" questions to try to determine his or her identity.  Once the player's identity is discovered, the player needs to find his or her match to win the game.  This activity works well with larger groups of participants.  Here are some suggestions of couples (or male and female characters who are often associated together):
      Santa and Mrs. Claus                        Mickey and Minnie Mouse
      Barbie and Ken                                Cinderella and Prince Charming
      Belle and Beast                                Anna and Kristoff
      Donald and Daisy Duck                     Kermit and Miss Piggy
      Mario and Peach                               Superman and Wonder Woman             

      Barack and Michelle Obama                Harry Potter and Hermione


Game:  Pass the Book!   
When you are out buying party supplies, pick up a $1 activity book for each child in the classroom or troop and individually wrap them.  Select a holiday book to read to the class, and make sure this book has one word that is continuously repeated throughout the story.  I typically choose this game when I am planning a classroom Christmas party.  I like to read the book Snowmen at Christmas by Caralyn and Mark Buehner because it's an adorable story, and the word snowman is repeated many times throughout the book.  One year I decided to try this game for a Valentine's Day party.  I chose the book Love, Ruby Valentine by Laurie B. Friedman.  
Product Details Before you officially begin the game, pass out the individually-wrapped activity books, handing one to each child.  Instruct the children to pass his or her book to the child on the right every time they hear the word "Ruby."  Begin reading the book, emphasizing the word "Ruby," depending on the age of the children.  At the end of the story, the children get to open the book they are holding at that time.  I have played this game with kids in kindergarten through second grade, and they loved it!  I'm sure older kids would enjoy it just as much, but be sure to select a book and prizes that are age-appropriate.


Snack:  Krispie Kisses.  


I found this YouTube video that shows how to make a giant Hershey's Kiss using Rice Krispies cereal.  

I have made smaller Krispie Kisses for classroom treats.  Instead of using a large funnel as shown in the video, I selected a funnel that is 3.5" wide.  I also do not cover the kisses in melted chocolate, though that sounds divine!  When I have combined a 1 stick of butter, a 10 oz bag of mini marshmallows, and about 12 oz of Rice Krispies, the recipe yielded about 16, 3.5" kisses.  I spray my wooden spoon and my hands with cooking spray to make the process a little easier.  You have to work quickly because you don't want the warm mixture to cool before you form all your kisses.  Once the mixture has been packed in the funnel, I immediately turn the kiss out onto a cooling rack on my kitchen counter.  I do not put them in the fridge as is shown on the video. While the kisses are cooling, I cut an 8"x8" square of foil for each kiss.  I spray the foil with cooking spray just to be on the safe side.  I wait until the kisses are completely cooled before wrapping them in foil.  I store them in an airtight container until the party.  This is a great Valentine's Day party treat because the kids can take the Krispie Kiss home quite easily if they choose not to eat it at the party. 

Happy Valentine's Day!  Thank you for reading.

Tuesday, November 26, 2013

Christmas Party 2012

As I was writing about the Light Bulb Snowman ornaments our girls will be making at this year's Christmas party, I realized I never posted anything about last year's party.  Our Brownie troop planned a party for our Daisy troop, knowing that they would also be participating in the fun.  They were asked to bring snack, game, and craft ideas to our planning meeting.  They voted for their favorites.  Both troops and their families went caroling at a local nursing home prior to the party.  I will write a separate post for that event.  Here is a glimpse of our fun-filled festivities:


7:30pm--Upon arrival, the girls guessed how many peppermints were in a pint-sized mason jar.  They wrote down a number.  The girl who guessed closest to the actual number got to take the jar home.

7:40pm--Unwrap Relay.  Empty boxes were wrapped in paper prior to the party.  The girls were divided into two teams.  One at a time, the girls raced to unwrap one gift using her non-dominant hand.  We made sure to recycle the wrapping paper!

8pm--Thumbprint Reindeer Ornaments.  After finishing their reindeer, the girls wrote their names and the year on the ornament with Sharpie markers. We used egg cartons to allow them to dry and to help transport the ornaments home at the end of the night.

8:20pm--Snack.  Please check out this post to see the snacks the girls enjoyed at this party.  They each had a chance to add whipped topping to the top and bottom of a strawberry to make a Santa Brownie.

8:40pm--Paper Plate Game.  The girls were supposed to hold the plates on top of their heads and follow the instructions.  We allowed the younger girls to put their plates on the table, but they had to promise to keep their eyes closed.  I LOVED their faces when they saw their drawings!


8:50pm--Snowman Soup Goodie Bags.  The girls decorated a tag for their goodie bags with stamps and markers.  The bags included a packet of hot cocoa mix, a couple of small candy canes, and some mini marshmallows. 
They finished their goodie bag tags rather quickly.  Luckily, the girls had planned additional activities in case we had extra time.  We divided the girls into two teams and spent those last precious minutes playing Minute to Win It--Stack Attack.  They raced each other to stack 15 cups in a pyramid. This was my favorite part of the party.  The excitement was palpable.  So many squeals, giggles, and even some groans.


I am kind of glad I forgot to write this post last year.  I have really enjoyed looking back through these pictures.  I am now full of the spirit of the season.  Happy Thanksgiving and Merry Christmas!  As always, thanks for reading.

Sunday, May 5, 2013

Brownie Badge: Snacks

Three years ago, when the girls were in their first year of Girl Scouts, we held our meetings in a room at the school.  We developed a rotating schedule, and each family was asked to provide a snack for the meetings.  For the past two years, we have met at my house.  The girls have had the opportunity to eat a snack at home before the meeting, saving our precious meeting time for business and fun.  The girls do love a special treat every now and then.  The snack badge gave them a chance to make a typical meeting a little more exciting.  While the Girl's Guide to Girl Scouting provides guidelines for Brownies who are working to earn the badges, I feel it is acceptable to think outside the box when it comes to meeting the required steps.  

Step 5, for example, is called Slurp a Snack.  The Guide gives three choices:  make your own milkshake, make your own fruit smoothie, or make your own party punch.  We decided to make our own slushies.  While a slushie is not a milkshake or a smoothie, it is a snack you must slurp.  Our family purchased a Ninja blender from Kohls, using a 30% off coupon, of course.  This blender crushes ice remarkably well.  Perfect for slushies.  This treat is relatively low cost especially when you consider how much it would cost to buy your troop a frozen drink at Dairy Queen or all the ingredients required to make a fruit smoothie.

Step 4 is called Snack For Energy.  We created a snack for a group when we were at camp this past fall.  We enjoyed trail mix while we were on a hike.  Please note that I like to plan ahead with help from the girls.  If we are doing an activity for one badge that can also satisfy a requirement for another badge, we recognize this.  No need to make more work for ourselves.  Snacking on trail mix during our hike allowed us to complete Step 4 for the Snacks badge and Step 4 for the Hiker badge (also called Snack for Energy). 

Step 3 is called Try a Sweet Snack.  Our troop planned a Christmas Party for the Daisy troop.  We asked the girls to bring snack ideas to the planning meeting.  The girls voted and decided to serve North Pole Cupcakes and Santa Brownies.  The cupcakes were prepared prior to the party, but we allowed the girls to assemble their own strawberry Santa hat on a brownie.  We spooned Cool Whip into plastic baggies, and we snipped off a corner so the girls could pipe the Cool Whip with minimal mess.  


I would like to end this post by describing how we completed Step 2 which is called Make a savory snack.  While driving to one of our events, we discussed the difference between a sweet snack and a savory snack.  The girls provided examples, and after the event they each enjoyed some cheddar crackers.  One of the choices provided for this step in the Girl's Guide is "make a savory snack from a different country."  This is one of those times when we took some creative liberties when it came to satisfying this requirement.  We took our girls to the Melting Pot, a fondue restaurant in Cincinnati.  We listened to a short presentation on the history of fondue, learning how others around the world enjoyed fondue and how it became popular in America.  Then we enjoyed an amazing spread of sweet treats.  At just $3 a person, this is a reservation you certainly want to work into your schedule.  Just make sure to have a lot of napkins!


Thanks for reading!
 

Monday, May 21, 2012

Don't Let the Bed Bugs Bite!...Our Near Sleepover

I have fond memories of sleepovers with my friends once I reached junior high. I loved lying on the floor in my sleeping bag, watching music videos on MTV and talking with my friends about cute boys. When I was younger, though, I was the kid who often cried and asked to go home when it was time to go to sleep.  I remember Girl Scout Camp being especially stressful for me--not only was I not sleeping in my own bed, but I was bunking in an unfamiliar lodge or platform tent.  Our troop is planning our first overnight lodge camping trip for this fall.  The girls in the troop are in first grade, and most of them have never been to a sleepover.  I thought it might be best to invite the girls to my house for a "Near Sleepover" to practice for our big overnight.

Since this was a Pajama Party, we decided this was a fantastic opportunity to participate in a service project.  Our girls and their families went through closets and drawers to find gently-worn pajamas they could donate.  Our troop collected 71 pairs of pajamas that we delivered to Matthew 25 Ministries.   


Girl Scout Law ribbon flip flops
The girls arrived at my house at 6pm.  They were instructed to wear their pajamas and to bring their sleeping bags.  Special stuffed animals and blankets were welcome, of course.  When the girls arrived, they made a friendship pin that they each got to keep.  I had asked the parents to purchase a pair of flip flops the girls could decorate during our party.  These flip flops were available at many stores for around $2 a pair.  Prior to the event, I bought spools of 1/4" ribbon in each of the Daisy Petal colors, including royal blue for the Promise Center.  I cut four 6" pieces of ribbon in every color for each girl and placed them in a plastic baggie.  The girls tied the ribbons in knots onto the flip flops.  I explained that each color ribbon represents the Daisy petals and corresponding component of the Girl Scout Law. 

We surprised the girls with Strawberry Facials.  I pureed the strawberries and milk before the party.  Moments before we were ready to apply the mask, I added the cornstarch.  The girls wore the mask for about 10 minutes, and we continued our program that focused on the dark purple petal (respect myself and others). 


I read the "One-of-a-Kind Body" chapter out of Joy Wilt's You're One-of-a-Kind to the girls which explained that every person's body is unique and special.  Then I read Zink the Zebra  which is a story about a zebra with spots instead of stripes.  It was written by a young named Kelly Weil who was battling cancer.  "Zink questions why she is treated differently by others just because she looks different on the outside."  I came across a Zink the Zebra Leader Guide that proved to be an amazing resource for this program.  Our girls made Zink Storybooks that can be found on pages 21 and 22 in this guide.

After the lesson, the girls made banana boats.  They filled their bananas with chocolate chips, peanut butter chips, and marshmallows.  We wrapped them in foil and popped them into a 325-degree oven for about 10 min.  Gooey and delicious!

The girls settled into their sleeping bags around 8pm to watch Dolphin Tale.  This movie tells the story of the relationship between a boy and a dolphin who lost her tail in a crab trap.  It tied in perfectly with our lesson for the evening.  Parents picked up their daughters around 10pm.  All of the girls were asking when they could come back to stay until morning.  The night was certainly a success!