Showing posts with label Snack badge. Show all posts

Wednesday, February 15, 2017

Cupcake Club: February

The February Cupcake Club meeting happened to fall on Valentine's Day.  We  baked red velvet cupcakes, and members decorated them with three different designs:

1.  Sweet Heart Cupcakes 
While I don't have a picture to share, there are beautiful examples provided in this link.  The kids were instructed to slice off the top of the cupcake.  They set it on a piece of wax paper at the work station.  We didn't have heart-shaped cookie cutters in the right size, so the kids used a knife to cut a small heart from the center of the top. After discarding (or eating) the heart, they dusted the top with powdered sugar.  They were then asked to spread frosting on the cupcake (the cake in the paper liner) before replacing the top on the cupcake.  Once the cupcake had been reassembled, the pink frosting peeked through the heart.

2.  For the second cupcake, they spread cream cheese frosting on the top and used Wilton sugar hearts in various shades of pink as decorations.  Pretty and simple.

3.  Love Cupcakes 
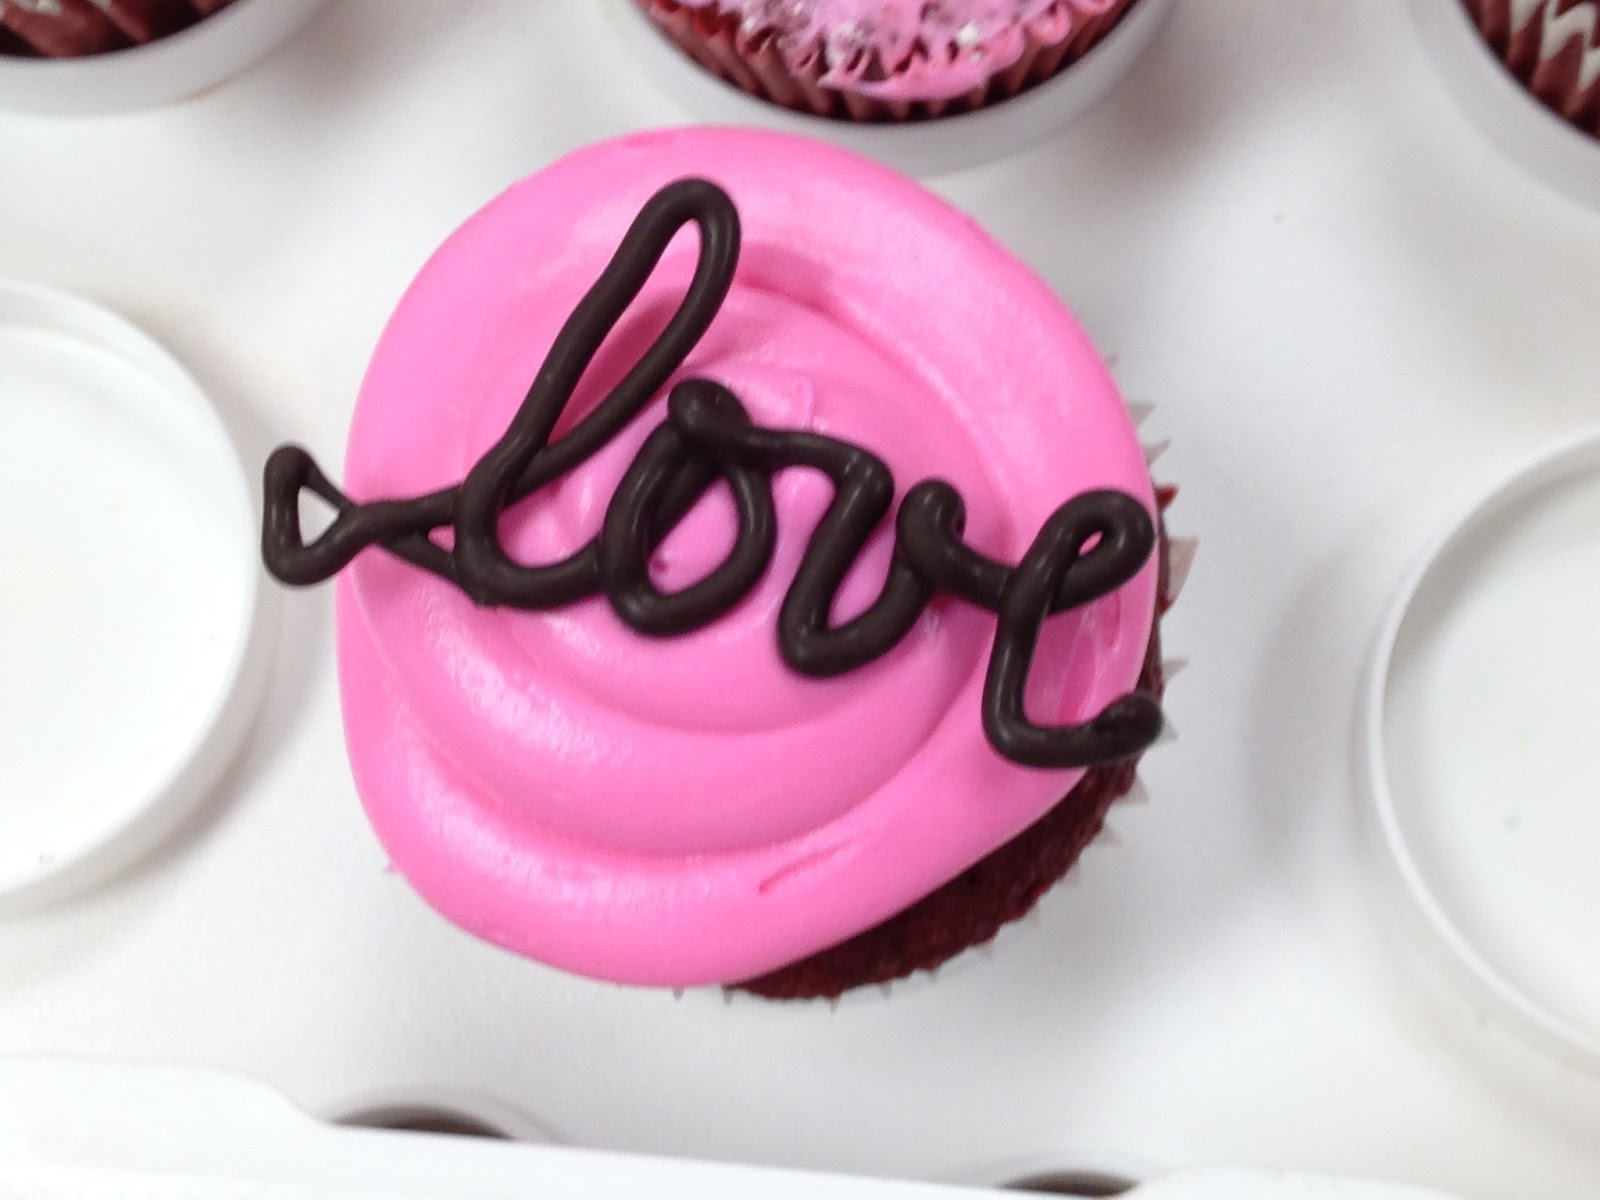
Prior to the meeting, I melted a bag of dark chocolate candy melts in the microwave.  Once smooth and creamy, I poured the melted candy into a piping bag that was fitted with a small round piping tip.  (Caution: bag was quite warm, and the candy dripped from the tip).  I wrote the word love on a sheet of wax paper I had taped to the kitchen counter.  I then drew hearts and drizzled chocolate through the center. 


If you wish to create beautiful filigree hearts, I would suggest you follow the instructions provided by Martha Stewart here

Before heading over to the school, I filled three piping bags with cream cheese frosting I had tinted pink.  Club members used large round, closed star, and open star tips (Wilton piping tips 2D and 1M) to frost these cupcakes before adding the chocolate embellishments. The Club's faculty advisor and I were impressed with the improvement in their skills!


During each meeting, the kids get to enjoy a cupcake, and they donate the rest.  Last month, one parent suggested we recognize the school district's bus drivers.  After the classroom had been cleaned up, we walked across the parking lot to the bus garage and delivered two trays of holiday cupcakes.  The gesture was greatly appreciated, and I thank Emily for the wonderful idea!

Saturday, January 7, 2017

Cupcake Club: December

My older daughter moved up to the middle school for sixth grade this year.  She considered joining several clubs before deciding to begin the Cupcake Club.  For the idea to be considered by administrators, she had to draft a proposal.  She and I discussed possible questions the teachers may have about the club, and she composed a plan to present to the school's front office.  The proposal was accepted, and a teacher agreed to be the club's advisor.

The group met after school one afternoon in October to discuss how the participants would obtain cupcakes, frosting, and supplies for the meetings.  They also shared favorite flavor combinations and possible themes for future meetings.  The club did not meet in November, and I helped with the December meeting.

My daughter baked two batches of Christmas Funfetti cupcakes the evening before the meeting.  We bought two tubs of vanilla frosting, and the kids used a bag of Rolos, and a large bag of M&Ms to decorate the cupcakes as ornaments as pictured here


After enjoying one of their creations, club members agreed to donate the remaining treats to the police and fire stations around the corner from the school. (I wish I could post a group picture, but I don't have permission).


The next time your Girl Scout troop is preparing for holiday parties and service projects, recreate your own Cupcake Club. Girls will have fun decorating cupcakes (craft). They could enjoy one (snack) before heading out to deliver the rest (service project).  What a great way to celebrate Juliette Gordon Low's birthday or the birthday of the Girl Scouts!  In addition, your girls could satisfy a badge step for the Brownies Snack badge or the Juniors Simple Meals badge. 

The Cupcake Club meets again this week to decorate cupcakes they'll sell during a Bake Sale during basketball games at the school.  I'll let you know how it goes.  As always, thank you for reading!

Tuesday, April 5, 2016

Tinker Bell-Inspired Spring Party

Knowing we'd have a few free days at home during Spring Break, my daughters asked if they could invite some friends over for a party.  We bumped around Pinterest and brainstormed together, coming up with a Tinker Bell-inspired plan that was sure to be a hit.  The guest list included nine kids, ranging from second to sixth grade.  Here's how we spent our time together.

Paint a flower pot.
When allowing a large group of kids to paint, squirt paint on one or two paper plates per table and assign one paint brush per colorWhen every child has his or her own paint brush, a cup of water is needed to rinse the brush between colors.  This has the potential to create all kinds of messes.  When one brush per color is used and the kids are finished painting, the paint brushes can be collected and rinsed all at once.  Minimal mess, minimal clean up.  During this party, I allowed half an hour for painting.  When the pots were dry, the kids had the opportunity to plant a pretty annual in their flowerpot to take home.

Make tissue paper flowers.
We've made tissue paper flowers in the past with our Girl Scout Troop.  Prior to our Spring Party, I referred to this pin and prepared stacks of assorted colors of tissue paper: five 8"x8" squares for each flower.  Following these instructions, the kids made their own flowers.

GAMES:
Fairy Mary's Lost Things
When our Junior Girl Scouts were earning the Detective Badge, we played a version of the tray game.  During our Spring Party brainstorming discussion, my older daughter suggested we play the tray game and call it Fairy Mary's Lost Things.  Brilliant!  I collected small items from around the house and assembled them on a tray that I covered with a dish towel.  The girls were given one minute to view the tray, and they had five minutes to write down every object they could remember.  Here is a list of the items included on this tray:
cotton ball, pearl-head needle, postage stamp, match, spring, penny, plastic outlet cover, Lego, paper clip, nail, washer, screw, glitter, key ring, picture hook, push pin, safety pin, Christmas tree light, rubber band, spool, battery, q-tip, toothpick, needle, plastic needle, hook/carabiner, zip tie, staples, button, light bulb.

Tinker Bell Paper Plate Game
I have incorporated the Paper Plate Game into several different Girl Scout and classroom Christmas parties, and it never seems to get old for the kids.  Earlier this year I made up another version of the game to get our troop excited for the Cookie Sale.  In preparation for this Tinker Bell-inspired party, I thought I'd give it another whirl.  To be honest, I was unsure if I was going to be able to pull it off.  To my surprise, the kids seemed to love it.  Maybe it's in the presentation?  I tend to get excited at parties. 

Steps:
Draw a mushroom, add dots if desired.
Draw a ladybug on the mushroom.
Draw Tinker Bell next to the mushroom.  She’s wearing a dress and booties.
She is holding a flower.
Draw Tink’s wings.

Points:
1 point for each dot on your mushroom
2 points if your ladybug touches the mushroom
1 point for each spot on your ladybug
2 points if Tink is wearing her dress
1 point if Tink’s booties have little pompoms
1 point if Tink is holding her flower
1 point if your wings are touching Tink

Name the Baby Animals
A couple months ago, my daughters and I attended my sister-in-law's baby shower.  One of the games we played involved naming the offspring of different animals.  We decided to play this game during the Spring Party with our friends.  Here is the list we compiled:
Cow--calf                               
Goat--kid
Raccoon--cub                          
Bear--cub
Wolf--pup                               
Sheep--lamb
Goose--gosling                       
Deer--fawn
Owl--owlet, fledgling              
Koala--joey
Fox--kit, cub, pup                    
Penguin--chick
Eagle--fledgling                      
Rabbit--bunny
Horse--foal                             
Toad--tadpole
Dog--puppy                            
Cat--kitten

The kids were permitted to work together.  This was just for fun--no prizes.  I could not believe they named every single baby animal correctly!
 
FAVORS:
eos Lip Balm Flowers


To create these cute flower favors:
  • Purchase a couple four-packs of eos lip balm from Sam's Club.
  • Choose a solid color sheet of cardstock and cut 4" scalloped circles with the Mini Monograms Cricut cartridge.  The finished circle is about 3.5" in diameter.
  • Use the 3" Uchida scalloped circle punch to cut the patterned paper.
  • Use a circle cutter to remove a 1.5" circle from the center of the solid cardstock and patterned papers.
  • For the leaves, cut a 1.5" circle with the circle cutter. Cut another circle using the 2" template and blade, leaving about an inch uncut. Draw the leaf and cut out with scissors.
  • Unscrew the lip balm and align the leaf, solid cardstock, and patterned paper as desired before replacing the lid.   
  • Arrange the favors in a basket and let the girls choose their lip balm when they are heading home.


Blaze Glow Stick Lightning Bugs
My girls love Blaze, the lightning bug in Tinker Bell And The Lost Treasure.  We bought glow sticks from Dollar Tree and the black pom poms from Hobby Lobby. We had the googly eyes and vellum remaining from previous projects.  My daughter used the Creative Memories Oval Cutter to cut 2" ovals for his wingsThe wings were attached to the glow sticks using glue dots.  We used tacky glue to adhere the googly eyes to the pompoms.  After tying knots in the strings provided with the glow sticks, we strung them from a hanger to display. 


The Food

For our party of 20 people (kids and parents), we decided to keep it easy and ordered a tray of chicken nuggets from Chick-fil-A.  The day before the party, I called and ordered a medium tray of 120 nuggets, paid for the order over the phone, and gave them a pickup time.  Knowing I would pick up the order hours before we were going to eat, I was given the option to order cold nuggets. Warming instructions were provided with my order.  It was super easy to spread the nuggets on cookie sheets and pop them in the oven for 10-20 minutes.  (Huge thanks to my friends for helping with this!)

Additionally, a friend offered to bring fruit and a veggie tray to share.  I baked some cheddar rosemary scones by following this Ina Garten recipe, substituting fresh rosemary for the dill.  For dessert, the kids snacked on dirt dessert served in a pint-sized mason jar with a sugar lady bug resting on the Oreo crumbs.  We prepared the dirt dessert a little differently than found in most recipes online.  
  • Prepare the chocolate pudding as directed on the package.
  • Scoop a spoonful or two of pudding in the bottom of the mason jars.  
  • Crush a package of Oreos and divide, reserving enough crumbs for the top layer.
  • Combine the remaining chocolate pudding and Oreo crumbs with an 8oz container of Cool Whip.  
  • Place a gummy worm on top of the pudding in the mason jar.
  • Spoon a healthy dollop of the pudding/crumb/Cool Whip mixture in the jar.
  • Add another gummy worm and cover with Oreo crumbs.
  • Place the sugar lady bug on top.  
  • Refrigerate until ready to serve.
For the adults, we made this frozen lime pie, another Ina Garten recipe.  It is DELICIOUS!
  
I thought readers who are hosting a birthday party or tea party for school-aged kids might find this post to be helpful.  This would also be such a fun way to help a Brownie troop complete a step or two for their Bugs and Snack badgesAs always, thank you for reading!

Tuesday, November 3, 2015

Free Junior Chef Classes at Williams-Sonoma

While shopping at the mall for my daughter's birthday gift, I noticed a large sign near the doors to Williams-Sonoma.  They were advertising their upcoming cooking classes.  My eye was immediately drawn to the listing for FREE Junior Chef classes for kids ages 5 to 13!  

Class size is limited (in this case to 15), but thankfully I was able to secure the final spots for the Thanksgiving Helper: Soups and Mini Desserts session that was scheduled to take place on Halloween morning.  In fact, there was room for only one of my children, but the store employee told me they could probably squeeze my other daughter in because they didn't want to have to turn away one in the pair.  This was confirmed when I called the store to confirm our spots a couple days prior to the event.  They told me someone had canceled, so both of my daughters had a place at the table.  However, this employee also told me they would have accommodated the second child even if there had not been a cancellation.  While I would not have expected it, I did appreciate their willingness to accommodate our family.

When I called the store to confirm, I asked if our girls should bring anything or wear anything special.  I was told that a mixer would be used, so the kids could possibly get splashed--just wear something that can be thrown in the laundry.  This is important.  Stay with me...

We attended the class at the Williams-Sonoma at the Kenwood Towne Center is Cincinnati.  We arrived about five minutes early.  The 45-minute events at this store begin at 9:30am, but it should be noted that other stores don't start until 10am.  The employees could be seen preparing for the class, but they did not open the doors until 9:30am.  

The class participants were asked to wash their hands before finding a place to stand at a table that was set up behind the registers.  There were name tags and a couple of pieces of Halloween candy on each plate.  I wasn't sure if I was to stay, browse around, or head out of the store.  I followed the lead of the other parents, and we all ended up hanging out behind the kids' table.

The instructor welcomed us and because it was Halloween, she reviewed trick-or-treat safety rules with the kids.  She explained that she had made the butternut squash soup the previous evening because there was a lot of chopping and not enough time to do it during the class.  The kids would be making mini pumpkin pies during their time together.


When the class began, I immediately recognized that my girls were going to be disappointed with this "class."  They frequently help in the kitchen with meal preparation, and they are quite comfortable in the kitchen for kids who are only 9 and 10 years old.  To be honest, this "class" was actually a glorified commercial.  And I mean that with all due respect.  I realize that other children don't have (or want) the opportunity to help in the kitchen at home, and this is probably perfect for them.  I kept reminding myself that we were attending a free class in a store.  Of course, Williams-Sonoma wanted us to buy the products being used in the demonstration.  (And they did offer us a 10% discount).  However, after reading the description of the class and having the conversation with the store employee about the mixer, I had great expectations for the experience.  It just so happened that the reality was quite different.  My older daughter summed it up by saying, "That was a lot of listening and waiting."  She was exactly right.  But let me give you a sneak peek in case you are interested in experiencing the program for yourself.

Each child had a chance to cut a circle of pie crust out of refrigerated pie crust with a circle cutter.  They used a wooden juicer to tuck the piece of dough into a mini muffin tin.  The instructor did a great job making sure each child got to do a job--cracking eggs, pouring pumpkin pie starter into a bowl, and stirring ingredients together.


While the pies were baking, the kids and parents had a chance to taste a sample of butternut squash soup.  The instructor also explained and demonstrated how to make real whipped cream that they'd use to top their mini pies.  As they waited for the pies to finish in the oven, the instructor asked each child what they were going to be for Halloween, and each child shared his or her favorite candy.  Kids devoured the sweet treat, and parents were eager to enjoy a sample as well.

Prior to our arrival, I was contemplating the idea of registering my girls for another class.  I have since reconsidered.  That being said, there were a couple of kids who had attended classes in the past.  This may be a good opportunity for others which is why I chose to write this post.  By attending a Junior Chef class at Williams-Sonoma, Girl Scouts could potentially satisfy a step or two for the Juniors Simple Meals badge or the Brownies Snacks badge.  

Our next Girl Scout event is coming up in mid-November.  I invite you to check back with us soon!

Tuesday, October 13, 2015

Bake Sale and S'mores Fest

BAKE SALE
To kick off the school year, our principal allowed our troop to host a Bake Sale during Open House.  By holding the event prior to the the first day of school, we did not have to get permission from the School Board.  I did make sure to get permission from Council.  I was told they generally approve fundraisers if the girls are offering a product or service to the customers.  Our Council provided paperwork for us to distribute throughout the evening to girls interested in joining Girl Scouts.

Prior to the Bake Sale, we made some signs.  We also displayed photos from past troop events and activities on a large piece of poster board.  This allowed potential Girl Scouts to discover some opportunities they could have if they joined a troop. 


I asked the girls to each bake something to be sold at the Bake Sale (with an adult's supervision, of course).  If Brownies are working on the Snack badge, a Bake Sale easily satisfies Step 3: Try a Sweet Snack.  If Juniors are earning the Simple Meals badge, they can complete Step 4: Create a Delicious Dessert.  We had quite an array of sweet treats: Brookies, lemon bars, chocolate chip cookies, brownies, rice krispie treats, and M&M cookies.  My favorite baked good might have been the cupcake that was inspired by the school's mascot.  The "Cougar Cupcake" was a vanilla cupcake topped with buttercream, filled with strawberry jam, and baked in a red cupcake liner to match the school colors.  The cougar paw was made with a mini Oreo cookie and four chocolate chips.  Super cute!


The girls earned over $130 in two hours!  This money will be combined with a portion of the profits from the 2016 Cookie Sale, and the girls will plant a garden this spring for veterans and their families staying at the Fisher House in Cincinnati.  

S'MORES FEST 2015

In early September, a neighboring Service Unit hosted a FREE S'mores Fest event at a nearby state park.  Several years ago, our Daisy troop attended a Council-sponsored S'mores Fest Recruitment Event at one of the Girl Scout campgrounds.  We had fun, so I registered our girls for this event.

Upon our arrival, the girls gathered in a circle to play an ice breaker.  Each girl was asked to say her name and tell the group what she brought to the picnic.  The item had to begin with the first letter of her name:  "My name is Laurie, and I brought lemonade."  Because there were some younger girls in attendance, each girl was only asked to say her own name, what she brought, the name of the person to her right, and what she brought.  If older girls are playing, it's fun to try to repeat the name and item for each person in the circle.


The girls were divided into three groups by troop, and they rotated through three different stations:  s'mores, songs, and games.  The older girls hosting the event had lists of games and songs, and our girls were asked to choose between two games or songs, depending on the station.  They had enough time to play a couple of games and sing a few of songs at these stations.  There were enough ingredients available to allow each girl to make two s'mores.


Getting Girl Scouts together from across the community was the goal of this S'mores Fest, but what a fun way to recruit and register girls!  If you are hosting your own S'mores Fest, you may consider having a registration table and paperwork available for girls interested in joining a troop.  Based on my observations, the success of this event is highly dependent on the weather, available shelter, the number of girls in attendance, and the number of volunteers willing to help.  Looking forward, if enough help is available, it might be fun to include a craft station.  Years ago, our girls made God's Eyes with lollipop sticks and yarn.  This could be relatively inexpensive to try at S'mores Fest, especially if the event is held outdoors.  Two small sticks can replace the lollipop sticks, and the host only has to provide the yarn.   

When the weather doesn't cooperate, the event could be held at a local civic center or church.  While roasting marshmallows over an open fire would not be possible in this situation, you can still provide a s'mores-inspired treat.  I invite you to check out this post for s'more mini cupcakes that would be perfect for an indoor event.  

This month our troop will be learning all about the art of glassblowing.  Please check back soon to read about the experience!

Tuesday, May 12, 2015

Brookies

Our daughters get older, and there is an increase in the amount of chicken scratch covering the calendar that hangs on our refrigerator.  By color-coding this scrawl for each family member, my husband and I are able to successfully manage the chaos (though some days it doesn't feel like we're as efficient as we'd like to be).  I imagine this time of year is particularly crazy for most families as we gear up for summer break and the associated change in family rhythm and routine.  In previous posts, I shared some gifts that we make to give our daughters' teachers for Christmas and at the end of the school year.  One of the gifts is homemade bread with a cute tag made by the student.  My daughters and I love to bake.  I've let them help me in the kitchen since they were really young.  Most times we bake from scratch, but there are other times when we choose to use prepackaged ingredients.  Using measuring cups and spoons has been a great way for the girls to practice and improve their math skills without even knowing it.
Several years ago, I was introduced to the Brookie, an irresistable combination of brownies and chocolate chip cookies.  With just one bite, I was instantly hooked.  And then I learned how to make them... Brookies quickly became a family favorite!  Our older daughter's name is Brooke, so she thinks it's fun to take Brookies to her classmates for her birthday, and she gives Brookies as gifts during the holidays.

Every time we make Brookies, people ask me for the recipe.  As I mentioned earlier in this post, we usually bake from scratch, but when we make Brookies, it is much easier and quicker to use prepackaged ingredients.  So instead of a recipe, I have rather a list of instructions.  After searching online for a link of instructions to share in this post, I discovered there isn't a website out there that describes how to make Brookies like we do.  We have made this sweet treat many times, and my girls (ages 9 and 8) can now make it all on their own.  Of course, I'm always there to supervise the use of the hand mixer and oven.  After a great deal of trial and error, here are some tips for baking the perfect Brookies:
  • Purchase a box of Betty Crocker Triple Chunk Brownie mix and a tube of Pillsbury refrigerated chocolate chip cookie dough.  By choosing a different variety of cookie dough (peanut butter or sugar cookie, for example) and adding various toppings (chocolate chips, crushed peppermint candy, etc), the options are endless.  That being said, these two products have yielded the best results for us.
  • Spray an 8"x8" glass pan with cooking spray. (While we prefer to use a glass pan, please note that any oven-safe pan can be used).
  • Preheat the oven as directed on the box of brownie mix.  If using the mix mentioned above, and if using a glass pan, the oven should be set to 325 degrees.
  • Set the unopened tube of cookie dough on the kitchen counter to soften.
  • Prepare the brownie mix as directed.  For this specific brownie mix, combine 1/4 cup of water, 1/3 cup of vegetable oil, and 1 egg in a medium bowl.  
  • Stir until well blended.
  • Pour batter into the prepared baking dish.
  • Bake as listed on box.  If using the mix mentioned above, the recommended time is 35-38 minutes.  We usually leave the brownies in the oven for 38 minutes.  A shorter baking time has yielded a really gooey brownie layer in the finished product. Keep an eye on them so they do not bake too long.  
  •  Remove brownies from oven and increase the oven temperature to 350 degrees (as directed on the tube of cookie dough).
  • Using a spatula, spread the softened cookie dough over the warm brownies.  
  • Bake for 10-11 minutes or until the edges are lightly brown.  Remember the cookie dough will continue to bake as it's cooling.  The edges shouldn't be too dark when removed from the oven, but the middle of the cookie dough layer shouldn't be raw either.
  • Let cool completely before cutting.  
  • When my daughter is taking the Brookies to her classmates at school, I cut the 8x8 pan into 25 pieces.  If we're serving Brookies for dessert or giving them as gifts, I may cut them into 16 larger pieces.  
 
  • I set each Brookie on a flattened cupcake liner.  Mini cupcake liners are a good size when the pan has been cut into 25 pieces.  Most kids can devour it in three or four bites.  It's the perfect little treat to satisfy a craving!  But be warned...most people can't eat just one!

Place a couple Brookies in a snack-sized zippie bag or slide them into a treat bag and tie with a pretty ribbon.  In my experience, the Brookie is out of the wrapper and gone before the packaging is even noticed.  

For Girl Scout troop leaders, help your girls satisfy a step for the Brownie Snacks badge or the Juniors Simple Meals badge by baking Brookies with them.  While the Brookies are in the oven, the girls can work on other badge steps.  Have fun!  Thank you for reading!

UPDATE (October 2015):  
I volunteered to make a treat for my daughter's Halloween party at school.  She asked for Brookies with a twist.  We decided to drizzle white chocolate over the top once they had baked and completely cooled.  We wanted to cut this batch into a dozen pieces, so we gently pressed a mellowcream pumpkin in the center of each piece.  After letting the white chocolate set briefly, we cut the pieces and placed them in orange cupcake liners.  NOTE:  The traditional Brookie as prepared with the ingredients described above is nut-free, but individuals with certain food allergies may wish to avoid this Halloween treat.  I used a bar of Ghiradelli white chocolate for the drizzle.  The package stated the bar may contain tree nuts, and the Brach's pumpkins were manufactured in a facility where milk, eggs, tree nuts, peanuts, wheat, and soy are used in the production of other products.  

Friday, May 1, 2015

Mother's Day Tea and Traditions


When I think about celebrating Mother's Day, the first ideas that come to mind are tea parties and flowers.  Every Mother's Day since becoming a mother myself, we have invited my parents and my in-laws to our house for a special dinner.  In 2009, my mother-in-law asked if we could have a special Garden Fairy Party before the annual dinner.  We immediately starting planning the day, knowing that we spend the majority of our time together planting annuals in the flower beds in front of our house.

a craft for the Brownie Bugs badge
In preparation for the "Butterfly Bash," my daughters helped make pipe cleaner butterflies to be used as decorations.  This is a relatively easy and inexpensive craft that can be modified for kids of all ages.  I believe I may have loosely followed the directions posted hereMy girls were only 2 and 3 years old at the time, so they needed some help with this craft.  They enjoyed experimenting with different color combinations of pipe cleaners the most.  To make the butterfly your own, you can use beads and pom poms, brightly colored pipe cleaners, sparkly pipe cleaners...Many different variations of these butterflies can be found on Pinterest.  The girls also made invitations for their grandparents by drawing butterflies on construction paper and decorating them with markers and glitter glue.

We wanted to serve a light lunch before getting our hands dirty, so my girls helped make finger sandwiches.  Using a butterfly cookie cutter, my older daughter cut the bread.  We spread some with peanut butter and jelly, and others we filled with bacon, cucumber slices, and ranch-flavored cream cheese.  I also made Ina Garten's Cheddar-Dill Scones; however, I used minced rosemary and diced thyme instead of dill.  Again, we used the butterfly cookie cutter when cutting the dough.  The scones were spread with a prepackaged herbed cream cheese.  We also served a fruit salad and pink lemonade--two favorites at our house!
consider for Brownie Bugs and Snacks badges


For dessert, we made butterfly cupcakes using my mother-in-law's favorite Jello Poke Cake recipe.  To make the butterfly, I combined several different ideas I found online.  A quick Pinterest search provides plenty of inspiration.  To make the wings, cut a large marshmallow in half and dip in sanding sugar.  Use pastel-colored M&Ms for the body and a gumdrop for the head. 
Daisies can practice being friendly and helpful.


Even when my daughters were much younger, they were able to help properly set the table.  For the "Butterfly Bash," I made simple place cards to set at each seat.  We cut flowers from our yard for the table centerpiece.  

When planning a tea party with Junior Girl Scouts, they can complete the five steps to earn the Social Butterfly badge.  Daisy Girl Scouts can earn the orange petal for being responsible for what I say and do.  They can also earn the yellow petal for being friendly and helpful.

After looking back through pictures in our family scrapbook, I now recall that I helped our girls make special booklets to give to their grandmas during this tea party.  I asked questions such as "What is your favorite thing to do with Grandma?" and "What is your favorite memory with Grandma?"...  I recorded the girls' answers, ending the message with "I love you."  We helped the girls "sign" their names.  Note:  If school-aged children are making this gift, they could fill in the blanks with their answers.  For example, "My favorite thing to do with Grandma is _____________."  These kids may be able to write the questions and responses on their own.  It would be cool to have kids write on a pretty piece of paper from the craft store and put it in a frame for Mom or Grandma.  They could update their responses for future Mother's Day gifts. 

In addition to the booklets, we made butterfly suncatchers for the grandmas.  There are several different varieties available.  In my experience, painting suncatchers is easier for younger kids than decorating suncatchers with baking crystals.  Our family has used both, and we've been pleased with the results.  I would recommend painting suncatchers when when working with Daisy and Brownie troops.  Junior Girl Scout troops may have success filling the spaces of the suncatcher with the baking crystals, but I suggest having additional volunteers available to help.  Depending on the size of your troop, you may consider purchasing additional glass stain paint so the girls aren't all trying to share the same eight pots of paint.  Keeping with the butterfly theme, a mosaic butterfly stepping stone is another great Mother's Day gift idea.  We have helped our daughters make a few stepping stones over the years, but this is not a project I would tackle with our Girl Scout troop regardless of their ages.

When the girls in our troop were in kindergarten, we held a Thinking Day Tea.  When the older girls were Brownies, we had a Mother's Day Tea.  For this occasion, the girls in our troop invited their mothers to a tea party that we scheduled for late afternoon on a weekday in early May.  Badge steps and service projects are usually tied into our events, but this time we planned to give the guests an opportunity to socialize with each other.  Each family was asked to bring something to share whether it be a sweet treat, a savory snack, beverages, or paper products.  An email was sent and the ladies were asked to "Reply All" when they signed up to bring something.  As I mentioned earlier, this is great way for Junior Girl Scouts to earn their Social Butterfly badge.  Brownies can satisfy steps toward the Snacks badge, and Daisies can earn some petals.  It was a super easy event for the leaders and a lot of fun for everyone! 

Just a couple months after that Garden Fairy Party, my mother-in-law Nancy was diagnosed with a very rare and aggressive form of brain cancer.  She fought to the end but lost her heartbreaking battle on April 1, 2011.  Since her passing, Mother's Day has become even more special for our family.  Every May, a few days before the holiday, my husband and I take our girls to a local nursery to buy brightly colored blooms.  We spend Mother's Day planting flowers and mulching the beds, celebrating Nancy's life by taking plenty of time share our favorite memories of her.  Happy Mother's Day!  Thank you for reading.

    "The grass withers, the flower fades,
        but the word of our God will stand forever."

                                                     Isaiah 40:8