Showing posts with label craft. Show all posts

Sunday, December 31, 2017

Craft: Therapeutic Rice Bags

I had hoped to write this post earlier in the month, but I am just now getting around to it, which gives me the chance to wish you a Happy New Year!

Our fifth grader wanted to continue our tradition of giving her teachers a homemade gift for Christmas. Finding inspiration in the January/February 2016 edition of American Girl Magazine, she searched through a basket of material scraps in the craft closet and set off to make rice bags that after being placed in the microwave or freezer could be used to help relieve sore muscles.

Winging it with the first rice bag, she modeled the others after it. She decided a pair of 4" x 14" rectangles would do the trick. In addition to this gray polka dot fabric, she used cute prints, including characters like Charlie Brown and Rudolph along with another featuring festive Christmas trees, which were left over from another project.


Using sewing clips, she secured the edges with the right sides of the fabric together. These clips were easy for her to use and remove as she sewed, avoiding pin pricks and the need for assistance from an adult.
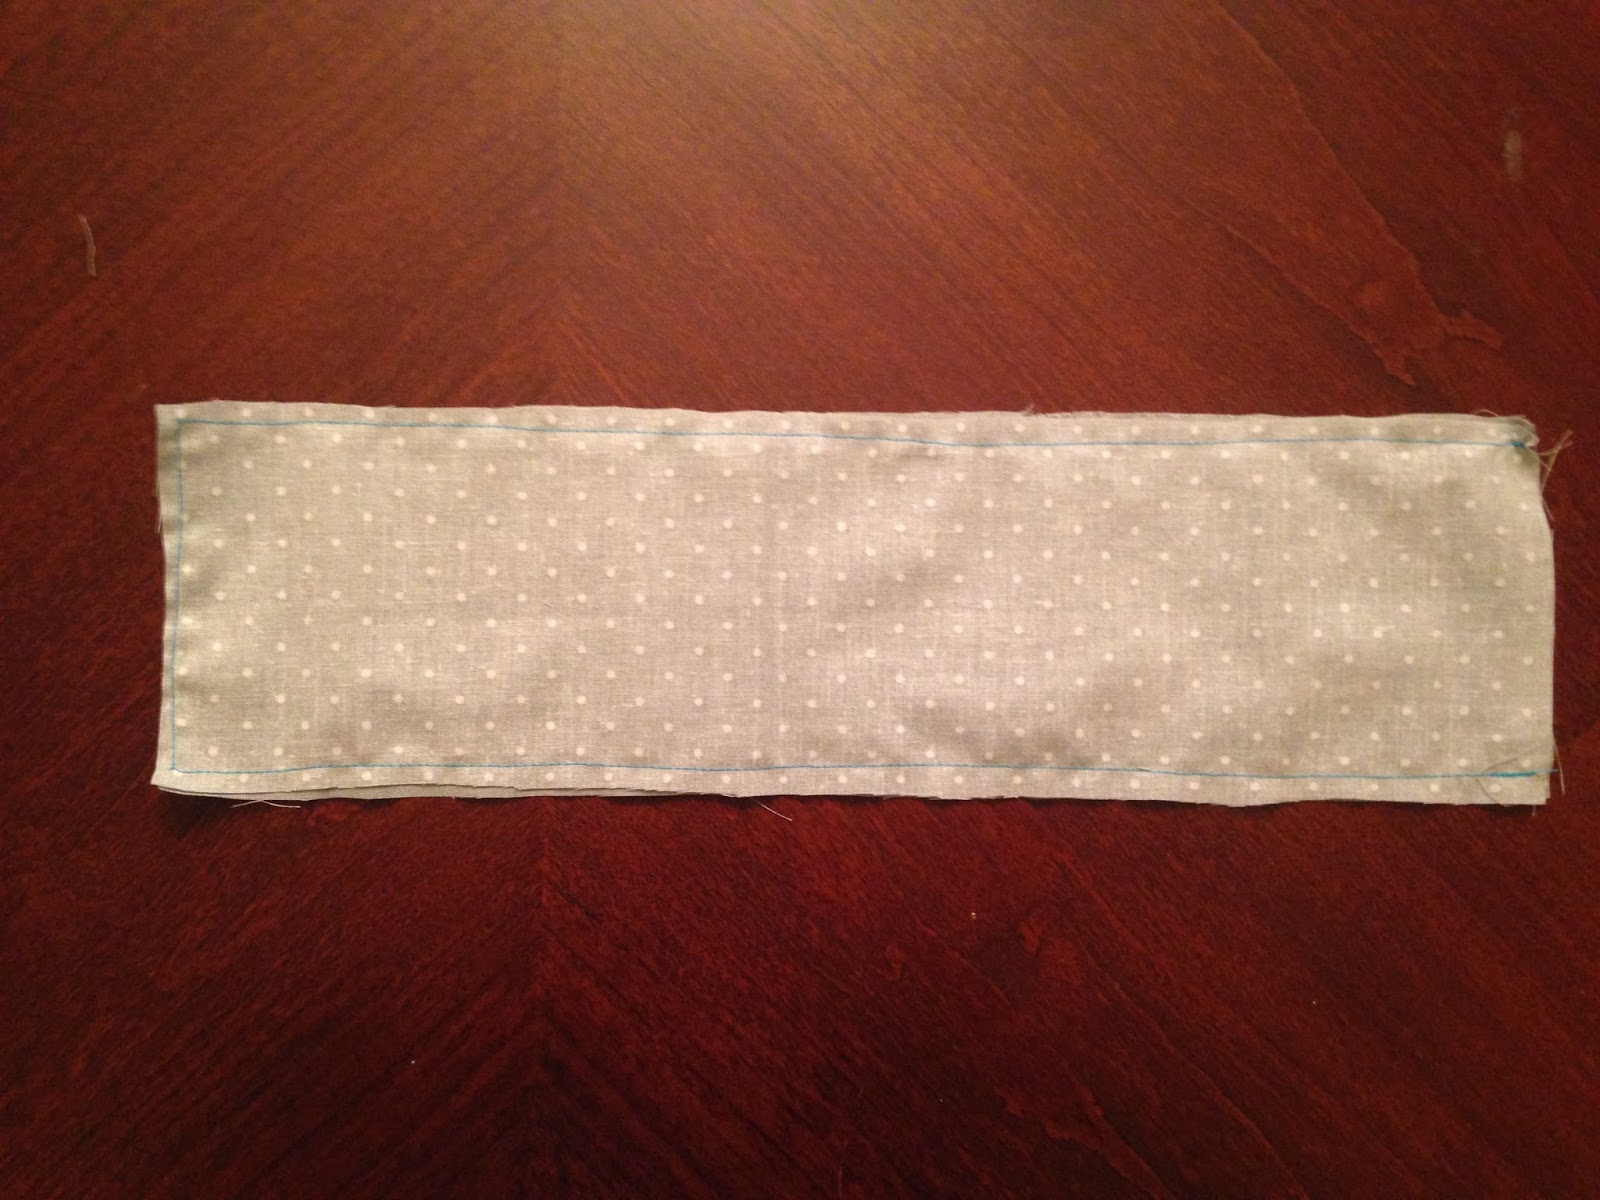
 She sewed a straight stitch along one 4" and both 14" sides, leaving the other 4" end open.

After turning the sleeve so the right sides of the fabric faced out, she used a skewer to help reveal the sewn corners when they remained tucked in the sleeve. She filled the bag with between 2 and 2 1/4 cups of uncooked, white rice. On occasion, the skewer helped clear the funnel as she poured the rice in the bag. 

Prior to this point, we had discussed different ways to finish the bag, and she chose to use the sewing machine to close the open edge of the full bag with a visible straight stitch. Heating and cooling instructions were handwritten on a tag that she attached to the bag with a safety pin.

She completed every step of the project on her own, and she was proud of the accomplishment, especially when her teachers expressed their appreciation for her effort.


I share this project here because she made a bag for me, and I found it to be quite soothing on tight muscles. Not only do these rice bags make great gifts, they are relatively easy and inexpensive to create. Scout troops could put them together and distribute them as part of a service project - recipients could include family members with a loved one in the hospital, residents in assisted living facilities, women in a residential addiction recovery program, or veterans staying in a Fisher House. Get even more creative and combine the project with a badge the troop is interested in earning. Have fun! And thank you for reading.

Friday, December 9, 2016

Craft: Photo Letters. Great Gifts.

To celebrate Christmas with a good friend, we will meet for pancakes as is our annual tradition.  Though we don't typically exchange gifts, I wanted to show my appreciation for her support this year. Earlier this spring, I made writing a priority, and my friend has encouraged me along the way.  I came across a variety of photo letters on Pinterest, and I thought this would be the perfect accessory for her office.  There are numerous tutorials available online.  I'm not trying to recreate the wheel, but I think this project could be fun for the girls in your troop--as a craft or a gift.

SUPPLIES:
  • paper mache letters ($2.99 at Hobby Lobby)
  • photos*
  • scissors
  • ribbon
  • paint
  • paintbrushes
  • Mod Podge
  • hot glue gun or tacky glue (ribbon)
*Making multiple letters?  Can the same pictures be used?  Save money by printing wallet-sized photos.  Not only will a greater portion of the image fit on the letter, but you get two prints of the picture with your order.
*The number of photos needed depends on the images.  Eight photos fit on the S.

GREAT HOLIDAY OR END-OF-YEAR GIFTS FOR:
Girl Scout Troop Leaders
Girl Scouts*
Teachers
Coaches
Sunday School Teachers

*GIRL SCOUTS
  • Incorporate this project into your Christmas or Winter party. You may need a few extra adult volunteers to help with tracing and piecing the pictures together, but I would have tried this project with our girls when they were Juniors.
  • Choose pictures of troop activities and this would make a cute bridging gift.

Friday, December 2, 2016

Craft: Fingerprint Christmas Lights for Teachers, Coaches, and Scout Troop Leaders

Looking for a fun and inexpensive holiday gift for teachers, coaches, and troop leaders this year?  I came across this canvas on Pinterest: a painted strand of Christmas lights spells out the word love, and fingerprints are the lights.  After brainstorming for several minutes, I decided this craft could easily be modified just by changing the word.

For Teachers:  learn, teach, educate, instruct, cooperate, school, name of subject (example: reading, writing, science), name of the school, school mascot.
*After listing these words off the top of my head, I discovered a website of vocabulary lists. I bumped around for a few minutes, finding lists for various subjects and areas of interests.

For Coaches:  coach, teamwork, team, together, name of the sport (example: basketball), sport specific words (example: dribble), aggressive, defense, practice.  
*Check out this website for additional sport-specific words.

For Scout Troop Leaders:  leader, leadership, courage, confidence, character, Scouts, Girl Scouts, trefoil, promise, badges, level of Scouts (example: Brownies).  
*This Girl Scouts vocabulary list provides additional ideas.

I thought this Christmas canvas would be fun to do with my daughter's fourth grade class during their winter party as a gift for their teacher. Knowing there are 24 students in the class, I chose the word learn and purchased a canvas with adequate space (8"x16"). I found a three-pack at Hobby Lobby for $7.99. With the 40% off coupon, the canvas package cost around $5 ($1.67 each). I also picked up a 6"x6" stand for $4. I chose to use black, red, blue, yellow, and green paint, which I already had on hand. 

As I painted the black string and sockets, I made a couple mistakes but decided to continue for practice. My daughters took turns placing their thumbprints on the canvas, and we alternated the colors of the lights along the way.  Here is the finished practice run in the stand:


Take Two! Here is the prepared canvas the students will finish for their teacher in a couple weeks. They will use a Sharpie to sign their names on the back of the canvas.

I'll be sure to update this post with a picture of the finished project.  I hope you enjoy this holiday season with family and friends.  Merry Christmas!

Wednesday, November 9, 2016

Alcohol-Inked Ceramic Tiles

On October 15th, my 11-year-old daughter and I attended Books by the Banks in Cincinnati. This "day-long festival, which is free and open to the public, features national, regional, and local authors and illustrators; book signings; panel discussions; and activities for the entire family to enjoy."  And enjoy, we did! In this post, I will highlight alcohol-inked ceramic tiles, one of the many different activities offered at the event to readers who visited Teen Scene.


Supplies:
  • Ceramic tiles--4"x4" or 4.5"x4.5".  These tiles are relatively inexpensive and can be picked up at home improvement stores.
  • Alcohol Ink.  I found 3-packs of Ranger Adirondack Alcohol Ink online for $10. I would look for the inks at a craft store where I could use coupon.
  • Rubbing Alcohol 
  • Tissues or cotton balls
Procedure:
  • Use a tissue or cotton ball to wipe the tile with rubbing alcohol.
  • Apply drops of alcohol ink to the tile. 
  • Allow the ink to dry.  Other readers returned after about 10 to 15 minutes to retrieve their tiles. By this time, the ink had dried enough to transport the tiles home.
NOTES:
*When my daughter made her tile, she dripped a complimentary color of ink on top of another drop, which resulted in a cool blending of colors.  Beware though, too much ink will cause the colors to bleed into an unpleasant brown. 
*While the price of the alcohol ink could pose a problem for the troop budget, keep in mind I was assured the ink goes a long way by the volunteer working this station.

This would be a fun craft to do during a troop party or meeting. Maybe incorporate it into a Self-Esteem Workshop and celebrate each girl's unique qualities alongside the beautiful tiles. Or think outside the box and plan for your Brownies to create these tiles to satisfy Step 3 (Paint a Mood) and/or Step 4 (Paint without Brushes) for the Painting badge.

I invite you to check back soon. In my next post, I will share another activity offered during the Books by the Banks event and explain how it can be incorporated in your next troop meeting. Thank you for reading.

Thursday, August 4, 2016

Cadette Badge: Good Sportsmanship

If my girls had decided to continue with a troop this fall, I'd have one Junior and one Cadette. Since they wished to earn badges on their own, I'm currently serving as a mentor for my two Juliettes. Last year, we had a split troop of Brownies and Junior Girl Scouts, so my younger daughter has already completed many of the Junior badge activities.  We agreed it is best for our family for both girls to work on Cadette badges this year.

My older daughter recently completed the Good Sportsmanship badge. She competed with a swim team for the summer, and we talked about the badge steps as the season progressed. As many readers prepare for the 2016 Olympic Games in Rio, I thought this was the perfect time to share her badge work with readers.

STEP 1:  Create your own definition of sportsmanship.

Go to a sports event:  Aside from the swim meets, our family attended several professional baseball games this summer. During a live sporting event, there are always great examples of good and bad sportsmanship being demonstrated by athletes, officials, and fans. She followed the suggestion on page 3 of the badge booklet and jotted down 5 ways to be and not to be a good sport.

STEP 2: Be a good competitor
Get a biography of a female athlete who's a great competitor: This was a tough decision for my daughter--Bethany Hamilton or Mo'ne Davis?  She chose to borrow a biography from the library about Davis, the former Little League Baseball pitcher. After reading the book, she wrote a poem about the athlete as suggested on page 4 of the badge booklet.  

When I needed to occupy my girls one day this summer, I suggested they make Bottle Buddies. My mom is a retired fifth grade teacher. Every year, she asked her students to read a book and create a Bottle Buddy out of a 2-liter bottle and craft supplies. Remembering those projects, I encouraged my daughter to create Mo'ne Davis. She used a plastic bottle, beads, yarn, felt, popsicle sticks, paint, markers, and googly eyes. Here is a picture of her Bottle Buddy. She added beads to Mo'ne's hair, recalling a story about the time when an umpire told her to remove the beads from her hair for a game because the opposing coach said they were a distraction.


Though my younger daughter has not yet chosen her biography for the badge, she also wanted to create a Bottle Buddy. She used a plastic bottle, felt, marker, googly eyes, and brown sugar to make Michael Phelps--love those abs.  I'm sorry, she tells me this is Michael Felts. As you can see, this kid's quite a character.


Bottle Buddies make a great craft for Girl Scout troop meetings--for example, Daisies could earn their green petal as they use their resources wisely. (They are using recycled plastic bottles and supplies left over from previous crafts).  I also think this could be a fun way to recognize Founder's Day or to celebrate Juliette Gordon Low's birthday. Maybe your girls could find a way to incorporate Bottle Buddies into Thinking Day. With so many Girl Scouts watching this summer's Olympic Games, making a favorite female athlete Bottle Buddy would be a fun way to kickoff the year

STEP 3:  Be a good teammate
Though incredibly long, swim meets are fun to watch. Not only are the swimmers competing against the other athletes in the pool, they are racing against the clock. Additionally, the teams are competing against each other. For the past four years, I've watched the kids on my daughter's swim team continually demonstrate good sportsmanship by encouraging and supporting each other. The girls will exchange high fives before mounting the blocks, and you can hear them say "good job" and "great swim" to each other as they climb out of the pool.

In addition to being a good teammate at the pool, my daughter was able to play "Capture the Flag" with some family friends at a recent gathering. As one of the older kids, she helped the group work as a team and kept the younger kids involved.

STEP 4:  Psych yourself up
Mind over matter:  Prior to prelims this summer, my daughter was aware of her seed in the tournament and the time she needed to beat to secure a place in Championships. We talked about visualizing her start, the strokes, turns, and a strong finish. I watched her mentally prepare as she waited to mount the starting block. We were ecstatic when she swam a personal best!


STEP 5:  Put your definition of good sportsmanship into action
One of my favorite moments this season occurred just after a swimmer from another team touched the wall a fraction of a second before my daughter. When their heads popped out of the water and they saw the results of the race, the two ten-year-olds reached over the lane lines and grabbed hands. 

Both girls will play basketball this winter, and my younger daughter will complete the badge requirements at that time.

We have quite a few badges on the list to complete this year. I hope you will check back as I hope to publish again soon. Thank you for reading.

Thursday, June 16, 2016

An Exciting Announcement

I am excited to announce I am writing books for middle grade readers. This week, I officially launched my website:   http://lauriestroupsmith.com/  Though I am not yet a published author, I will document my experiences on the new website as I pursue this goal. Additionally, I hope to connect and inspire readers and their families through fun reading and writing projects, puzzles, and games related to my books. 

If this idea interests you and your Scouts and you would like to encourage this journey, I invite you to visit and "like" my Facebook page.  I'm looking forward to connecting with you there.  Thank you in advance for giving it a chance.

As promised in a previous post, I will continue to document on this blog the badge steps and projects my daughters complete as Juliettes.  I truly appreciate the support you have given this blog over the past four years.  Thank you for reading.

Saturday, June 4, 2016

Craft: Tie Dye Crayons


This spring, my daughter's third grade class held a Product Fair.  For several weeks leading up to the special day, students earned play money.  Each student created a product and designed a poster, hoping to entice fellow classmates to spend their hard-earned cash on his or her goods.  My daughter decided to make tie dye Lego crayons, using silicone Lego molds we had purchased from Amazon several years ago.  Here are the steps she followed (with parental supervision, of course):
  1. Choose the crayons to use.  My daughter used 2-3 crayons of each color.


2.  Place the crayons in a zippie bag.  She used a separate baggie for each color.  The wrappers fall off when the crayons are smashed with a hammer or a rolling pin.  This is much easier and less time consuming than peeling the wrappers from the crayons.
3.  Preheat the oven to 200 degrees.
4.  Place the silicone molds on a cookie sheet.
5.  Sprinkle the crayon crumbles into the molds as desired.
                          
6.  Slide the cookie sheet into the oven and bake until melted.  We checked the progress in five minute intervals, adding minutes as needed.  The Lego men finished in about twelve minutes, and the Lego bricks took about 20 minutes.

NOTE:  After removing the Lego men from the oven, my daughter noticed the finished product was not going to be as thick as she had expected.  She sprinkled more crayon crumbles on top of the melted wax before sliding the cookie sheet back into the oven for about five more minutes.
    

7.  Let the crayons cool before popping them from the molds.

NOTE:  If a tie dye crayon happens to fall on the floor and crack in all the excitement, place the pieces back in the mold and bake until melted.  Once the crayon cools, it will be as good as new.

My daughter paired a Lego man with a Lego brick and packaged them for the Product Fair in a 4x6" clear treat bag.  These Lego crayons were quite a hit!  She was really excited to be the first in her class to sell out at the Product Fair.

With such a variety of silicone molds available today, the options are endless.  Tie dye crayons make great birthday party favors.  Consider trying this craft on a rainy day, during a birthday party, or at your next Scout meeting. (Think about using a bug-shaped mold to make a bug craft for the Brownie Bugs badgeRemember these crayons as the girls experiment with different shading materials for the Juniors Drawing badge).  I would love to hear how this worked for you and the special kids in your life.  Thank you for reading.