On a Friday evening in December 2012, our Daisy and Brownie troops went Christmas caroling at a local nursing home. At events like this, we believe "the more, the merrier!" We invited family members to join us. After caroling, we returned home to continue the celebration. Click here to learn how we spent the rest of the evening.
We devoted time during one meeting in November to prepare for this event. We made applesauce ornaments to deliver to the residents at the nursing home. Several mothers stayed to help. The girls did a fantastic job, but we definitely needed extra hands to help with rolling, cutting, transferring, and cleaning.
The girls also wanted to color pictures to hand to people as we sang Christmas carols. The nursing home residents loved receiving the beautiful Christmas pictures. They seemed to really enjoy seeing the kids. We were told that so many groups visit nursing homes around Christmas time. We were invited to return in the spring to play Bingo with the residents.
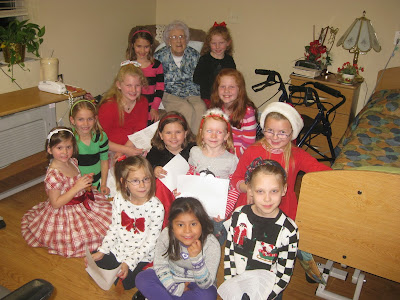 Before we left the nursing home, we had the pleasure of visiting with a special woman named Helen. She was born in December 1902, and she was celebrating her 100th birthday. She allowed us to pose for a picture with her when we explained we were celebrating the 100th year of Girl Scouting. We had a lot of fun! Thanks for reading.
As I was writing about the Light Bulb Snowman ornaments our girls will be making at this year's Christmas party, I realized I never posted anything about last year's party. Our Brownie troop planned a party for our Daisy troop, knowing that they would also be participating in the fun. They were asked to bring snack, game, and craft ideas to our planning meeting. They voted for their favorites. Both troops and their families went caroling at a local nursing home prior to the party. I will write a separate post for that event. Here is a glimpse of our fun-filled festivities:
7:30pm--Upon arrival, the girls guessed how many peppermints were in a pint-sized mason jar. They wrote down a number. The girl who guessed closest to the actual number got to take the jar home.
7:40pm--Unwrap Relay. Empty boxes were wrapped in paper prior to the party. The girls were divided into two teams. One at a time, the girls raced to unwrap one gift using her non-dominant hand. We made sure to recycle the wrapping paper!
8pm--Thumbprint Reindeer Ornaments. After finishing their reindeer, the girls wrote their names and the year on the ornament with Sharpie markers. We used egg cartons to allow them to dry and to help transport the ornaments home at the end of the night.
8:20pm--Snack. Please check out this post to see the snacks the girls enjoyed at this party. They each had a chance to add whipped topping to the top and bottom of a strawberry to make a Santa Brownie.
8:40pm--Paper Plate Game. The girls were supposed to hold the plates on top of their heads and follow the instructions. We allowed the younger girls to put their plates on the table, but they had to promise to keep their eyes closed. I LOVED their faces when they saw their drawings!
8:50pm--Snowman Soup Goodie Bags. The girls decorated a tag for their goodie bags with stamps and markers. The bags included a packet of hot cocoa mix, a couple of small candy canes, and some mini marshmallows.
They finished their goodie bag tags rather quickly. Luckily, the girls had planned additional activities in case we had extra time. We divided the girls into two teams and spent those last precious minutes playing Minute to Win It--Stack Attack. They raced each other to stack 15 cups in a pyramid. This was my favorite part of the party. The excitement was palpable. So many squeals, giggles, and even some groans.
I am kind of glad I forgot to write this post last year. I have really enjoyed looking back through these pictures. I am now full of the spirit of the season. Happy Thanksgiving and Merry Christmas! As always, thanks for reading.
Last year, the girls in our Brownie troop were planning a Christmas party for our Daisy troop. We asked the girls to bring game, craft, and snack ideas to the planning meeting. The girls loved this light bulb snowman ornament, but they voted to make these adorable thumbprint reindeer ornaments instead. Not more than a month after the Christmas party, my husband changed some of the light bulbs in our house. I asked him to save them for me, thinking that the troop could certainly put them to good use.
Here we are, almost a year later, planning this year's Christmas party. I dug those light bulbs out of our craft closet and got to work. The shape of this light bulb is perfect for a snowman.
Step 1: Cover the bulb with Mod Podge. A sponge brush works well. Do not cover the base or the bottom of the bulb.
Step 2: Sprinkle with glitter. Placing the light bulb in a container for this step minimizes waste and allows for easier cleanup.
Step 3: Allow to dry (only takes a few minutes). Please note: I read online that glitter will often peel from glass. Adding another coat of Mod Podge to the glittered surface was suggested. I applied the Mod Podge to a section of the back of the snowman. While the extra adhesive may keep the glitter from eventually peeling off, it seemed to diminish the sparkle. The glitter on the rest of the snowman seems to be staying in place, for now.
Step 4: Using a paintbrush and acrylic paint, apply the eyes, nose, and buttons.
Step 5: Let the snowman dry completely.
Step 6: Add a cute scarf. The pink scarf (left photo) is a piece of fuzzy pink pipe cleaner. Cut a piece 8" long and twist it around the neck of the light bulb. The red scarf (right photo) is a piece of felt. Cut a 0.5" strip along the 12" side of an 9"x12" sheet of felt. Secure the scarf to the neck of the light bulb. Cut off the excess felt to achieve the length desired. Fringe the edges.
Step 7: Tie a piece of yarn to the base and hang on the tree...or skip the yarn and sit the snowman on a shelf where it can be enjoyed all winter.
I was all set and had all the supplies ready to go...until I sat down to write this post. I was collecting some information online and found dozens of tutorials and photos posted by others who have successfully made these ornaments. I found this video demonstration by Clinton Kelly. After watching the segment, I have decided to follow his lead and slightly modify our steps. I will have the girls paint the base of the light bulb black. They will use puffy paint for the face and buttons when they make these ornaments next week.
It looks like I never posted anything about last year's Christmas party aside from the snacks we served. Since Christmas is right around the corner, I will be sure to share soon. We had a REALLY fun time! Happy Thanksgiving. Thanks for reading.
Earlier this summer, I was working on an album at our local scrapbook store. The store employee was covering paper mache letters with scrapbook paper in various prints. She was creating words like "summer," "thanks," and "fall." I watched her for a minute, thinking they would look good on our mantel or on the small table in our foyer. Then I caught a glimpse of the price tag. The words would be sold in the store for $40...around $7 a letter! I knew I could make these at home for a fraction of the cost, especially since we already have many bottles of paint and some Mod Podge that was used on previous projects.
I found the 8" paper mache letters at Hobby Lobby for $2.50 each. I purchased scrapbook paper for less than $1 a sheet. I always try to use 40% off coupons at these craft stores. Scrapbook paper and paint is often on sale. Depending on the letters chosen, you can cut one or two letters out of one 12x12" sheet of scrapbook paper. If you already have the paint and the Mod Podge, you can complete this project for around $3 a letter. Sounds great to me!
 I was bumping around Pinterest for some inspiration, and I came across this tutorial. I decided to try making BOO and JOY. (I loved the spider web paper featured on the tutorial so much that I copied the project exactly). The words were finished in an afternoon, and I was pleased with the final product. There are many other shorter words that would be easy and relatively inexpensive to create.
For the holidays: EEK, NOEL, HOP.
For the kitchen: YUM, DINE, EAT.
For the laundry room: WASH and DRY.
For the home: HOME, PRAY, LOVE, FAMILY NAME.
For kids: INITIALS.
I carried the thought of making initials for my daughters' bedroom one step further. Why not find time for our Girl Scout troop to decorate a letter? I will admit that we have not yet tackled this project. Maybe we will find time during our Christmas party, a spring meeting, or at camp? I will be sure to post photos along with a note to share what worked for us and what did not, so please check back. Thanks for reading!
I was bumping around Pinterest for some inspiration, and I came across this tutorial. I decided to try making BOO and JOY. (I loved the spider web paper featured on the tutorial so much that I copied the project exactly). The words were finished in an afternoon, and I was pleased with the final product. There are many other shorter words that would be easy and relatively inexpensive to create.
For the holidays: EEK, NOEL, HOP.
For the kitchen: YUM, DINE, EAT.
For the laundry room: WASH and DRY.
For the home: HOME, PRAY, LOVE, FAMILY NAME.
For kids: INITIALS.
I carried the thought of making initials for my daughters' bedroom one step further. Why not find time for our Girl Scout troop to decorate a letter? I will admit that we have not yet tackled this project. Maybe we will find time during our Christmas party, a spring meeting, or at camp? I will be sure to post photos along with a note to share what worked for us and what did not, so please check back. Thanks for reading!


