Tuesday, February 17, 2015

Junior Girl Scouts Badge: Detective

Step 1:  Practice the power of observation.  We played the Tray Game at our Christmas Party this year to satisfy this badge step.  I provided a detailed description of this game in my post titled Christmas Party 2014.  Additionally, our Brownies were working on their Senses badge.  To meet the requirements of one of their badge steps, we talked about Braille.  We discussed the ways blind people can be observant even though they can't see and how those ways are similar and different from observation skills used by people without impaired sight.  You can read more about that meeting here

Step 2:  Communicate in Code. 
As mentioned in Step 1 above, the Brownies in our troop were working on the Senses badge.  Visit this post to discover how we used the same activity to help our Brownies satisfy Step 5 of the Senses badge and our Juniors meet the requirements of Steps 1 and 2 for the Detective badge.

Step 3:  Fingerprint for Fun.  When we had a few minutes to spare during one of our meetings, I had the girls use a thumb to stamp a fingerprint on a 1.5" square piece of white cardstock.  I happen to have ink pads in a variety of colors, so the girls had a choice when making the print.  Once the cards were dry, the girls inspected each fingerprint, noticing that every fingerprint is unique.  I collected the squares to be used for a craft during our Self Esteem Workshop that is scheduled for March.  Please check back to read more about that meeting.


Step 4:  Try Out Detective Science.  I love to scrapbook.  Years ago, I was really into writing titles for my pages.  I purchased a book called Love Your Handwriting by Heidi Swapp.  When I read one of the choices to satisfy this badge step was to examine different handwriting samples, I dug that book out of the closet and searched for the perfect activity.  I modified one of Heidi's exercises, creating a worksheet for our girls.  They were asked to write the word trefoil in a variety of different ways.  Once everyone had finished, the girls exchanged papers.  They examined the similarities and differences in their handwriting.  


Step 5:  Follow the clues to solve a real mystery.  During our Christmas Party this year (December 2014), we had a mystery party.  We solved the "Who Stole the Cookies" (mini version) that we purchased from Merri Mysteries.  Check out this post to read all about our party.  

As a leader, I loved this badge.  I thought we could have easily completed more than one of the choices provided for each step in the listed as badge requirements.  Even after completing all five steps, I know our girls would be interested in continuing their work on this badge.  Maybe they will decide to do Detective badge, Part 2 next year?  I'm sure it won't be difficult to order a detective or mystery-related fun patch for their vests.  Thank you for reading!

Brownie Badge: Pets

If I had to guess, I'd say the Brownie Pets badge was one of our girls' favorite badges to earn.  In this post, I describe the choices we made to satisfy the requirements for each of the five badge steps.  Please note that I have had two different groups of girls earn this badge, and I have shared all of the activities that were completed by both groups in this singular post.

Day 1:  visit horse stables  (Step 2)
Day 2:  visit pet store and pet groomer  (Step 1, 3, 4, and 5)
Day 3:  t-shirt pet beds  (Step 2)
Day 4:  t-shirt dog toys  (Step 4)

*Based on my experience, you could visit the horse stables, pet store, and pet groomer in one day.
*The t-shirt pet beds will not be finished in one meeting.  The girls will have to work on them on their own at home.  
*I recommend an adult prepares the t-shirts for the pet bed and dog toy projects prior to the meeting.

Step 1:  Find Out What Care Different Pets Need.  To meet the requirements for this badge step, we headed out to a local pet store.  We called ahead to explain why we were visiting and made sure a store employee would be willing to answer questions about pet care.  The girls played Pet Bingo in the store, and they referred to the internet with their parents when they got home for additional information when needed.

From the animals listed on the Bingo game card, the girls chose cat, hamster, and fish.  They asked questions to learn how much it costs to care for each of these pets, how much space and food these pets need, and what kind of human contact these pets prefer.  They took notes, and I typed them up once we got home.

Step 2:  Keep a Pet Comfy.  My daughters made pet beds out of old t-shirts and a plastic sink mat from Dollar Tree to donate to a local animal shelter.  Instructions and photos of the process can be viewed here.  Additionally, the girls visited a horse stable and learned to muck a stall.  They found out why its important to muck a stall twice a day.


Step 3:  Help a Pet Stay Healthy and Safe.  We visited a pet groomer who allowed the girls to watch her work with this adorable little dog.  She was willing to answer all their questions, and she even gave them pet care tips they could use at home.  When we were at the pet store, the girls asked the store employee about health issues for cats and hamsters.  While they were mucking the horse stall, they asked how they can keep a horse healthy and looking good.
  

Step 4:  Make a Pet Feel Loved.  Our girls made t-shirt dog toys that we donated to a local animal shelter.  While working at the stables, one of the grooms took a few moments to show the girls how horses communicate their feelings.  During our visit to the pet store, they learned how cats communicate their feelings.

  
Step 5:  Feed a Pet.  The girls made a pet budget for a cat and a hamster.  They asked for guidance from the store employee before walking up and down the aisles to find the cost of food, treats, and vitamins their pets may need.  While we were visiting the stables, they made sure to ask how much it costs to feed a horse.  As I mentioned previously, the girls took notes during our trip to the pet store.  Once we returned home, they were able to refer to different websites to answer any follow-up questions they may have had.  


Compared to other Brownie badges our girls have earned, I thought this one required a great deal of work for the girls as well as the leaders.  Maybe it was the activities we chose?  We do not have a family pet.  If we did, the girls could have cleaned the pet's cage or tank, helped the pet get some exercise, make up a game to play with our pet, and make up a feeding schedule.  Completing hands-on activities such as these would provide an entirely different experience for the girls than the activities we chose to complete to earn the Pets badge.  Regardless, they had a lot of fun, so it was worth it!  Thank you for reading. 

Wednesday, February 11, 2015

Valentine's Day Party Ideas for Your Troop or the Classroom

I have two daughters--one is in fourth grade, and the other is in second grade.  Over the years, I have served as a Room Mother for their class parties.  I have volunteered as part of a team of Room Parents.  Most recently, I have stepped aside to let other parents join in the fun.  It's safe to say, I've seen classroom parties handled many different ways.  Money may be collected in a lump sum at the beginning of the year.  Requests for monetary donations may occur on a party-to-party basis throughout the year.  Sign-up sheets may be displayed, asking for party treats and supplies to be donated by families.  Parties may be planned months in advance.  Parties may be planned several days ahead.  Regardless, in my experience, the kids have fun.  This has also proven to be true with our Girl Scout troop parties.  While we have never celebrated Valentine's Day together as a troop, I thought I would share some of my favorite Valentine's Day party ideas that worked well in the classroom.  Maybe your Girl Scouts would enjoy including them at their next Valentine's Day event?

Craft:  Paper Plate Valentine's Day Card Holder. We first made these card holders with my daughter's preschool class.  Instead of punching holes in the edge of the paper plates and using yarn to sew them together, we used staples.  The kids decorated the plates with markers, crayons, and stickers.  We used yarn in place of the ribbon in order to hang the card holder on the back of a chair.  Unfortunately I do not have my own picture to share with you.  As the kids get older, they can sew the plates together using yarn or ribbon.  Maybe they could use paint and construction paper to make animal paper plate card holders

My mom is a retired fifth grade teacher.  When our girls were little, I would take them to her school during the Valentine's Day party.  She would ask her students to decorate a Valentine card box at home.  The Room Parents, another teacher, and I would get to judge whose box was the cutest, funniest, prettiest, and most creative.  This could be a fun activity to try with your Girl Scouts.  Have them decorate a tissue box at home and then bring it to the meeting or troop Valentine's Day party.  Allow the girls to vote for different categories, and do not allow them to vote for their own box.  Maybe the winners could receive a small prize or simply a congratulations from the other girls in the troop? 

Craft:  Cupig Candy Dish.  

  
Supplies needed:
  • 4" terracotta flowerpot
  • pink paint and paintbrush
  • 1 pink pipe cleaner
  • 2 googly eyes
  • 1 foam heart sticker
  • glue (Elmer's, Tacky, and hot glue?)
  • red or pink shredded paper


 Directions:
  • Apply two coats of paint to flowerpot.  (Acrylic paint dries rather quickly).
  • Curl pipe cleaner around a pencil.
  •  Use glue to attach tail.  (I found tacky glue worked better than Elmer's glue, but having a hot glue gun on hand may be helpful).
  • Use glue to attach googly eyes.  
  • Use a black Sharpie to make two dots for nostrils.
  • Peel the back off the heart sticker and attach the snout beneath the eyes.
  • Fill the flowerpot with shredded paper.
  • Add candy (like conversation hearts or individually-wrapped chocolates).


Game:  Pin the Tail on Cupig.   
Years ago, I drew a picture of a pig on a piece of poster board, and I added large googly eyesI used my Cricut or my Creative Memories Circle Cutter to cut 1" circles out of pink cardstock, and I made sure to have two circles per player.  For each child, I curled a pink pipe cleaner around my little finger and used a glue stick to sandwich the pipe cleaner between two of the circles.  I also prepared a construction paper mask for each child.  I free-handed masks on dark construction paper.  After cutting them out, I punched a hole in each side of the masks, using a standard hole punch.  I added two pieces of yarn to each mask to make it easy to put on as each child prepared for his or her turn.  During the party, we wrapped a piece of tape and stuck it to the back of the circle.  To make this game more challenging for older players, pair the kids up with a partner.  Set up a small obstacle like placing a chair between the kids and the pig.  One player is blindfolded and the other has to provide verbal cues to guide the partner around the chair and toward the pig.  Here are some photos of the materials:

Update:  I have the Cricut Personal Electronic Cutter, and I love it!  We have used it to embellish scrapbook pages and cut out titles for our pages.  We have used it to make various signs (Star of the Week, Welcome Home, team signs, and signs for Cookie Booths).  We have saved a great deal of time using the Cricut to cut out shapes for class party and birthday games.  This older model meets my current needs, so I'm not in the market for a new one.  That being said, Amazon offers a wireless version of this cutting machine According to the reviews, it is worth checking out!

Game:  Find Your Match.   
This game is a variation of the Guess Me Icebreaker Game that we played during our troop Christmas Party in 2013I love this game because it is inexpensive and requires little, if any, preparation.  It's similar to HedBanz in the sense that a piece of paper labeled with the name of a well-known character or person is pinned to the back of each participant.  Players walk around the room, asking other players "yes" or "no" questions to try to determine his or her identity.  Once the player's identity is discovered, the player needs to find his or her match to win the game.  This activity works well with larger groups of participants.  Here are some suggestions of couples (or male and female characters who are often associated together):
      Santa and Mrs. Claus                        Mickey and Minnie Mouse
      Barbie and Ken                                Cinderella and Prince Charming
      Belle and Beast                                Anna and Kristoff
      Donald and Daisy Duck                     Kermit and Miss Piggy
      Mario and Peach                               Superman and Wonder Woman             

      Barack and Michelle Obama                Harry Potter and Hermione


Game:  Pass the Book!   
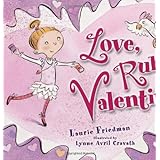
When you are out buying party supplies, pick up a $1 activity book for each child in the classroom or troop and individually wrap them.  Select a holiday book to read to the class, and make sure this book has one word that is continuously repeated throughout the story.  I typically choose this game when I am planning a classroom Christmas party.  I like to read the book Snowmen at Christmas by Caralyn and Mark Buehner because it's an adorable story, and the word snowman is repeated many times throughout the book.  One year I decided to try this game for a Valentine's Day party.  I chose the book Love, Ruby Valentine by Laurie B. Friedman.  
Product Details Before you officially begin the game, pass out the individually-wrapped activity books, handing one to each child.  Instruct the children to pass his or her book to the child on the right every time they hear the word "Ruby."  Begin reading the book, emphasizing the word "Ruby," depending on the age of the children.  At the end of the story, the children get to open the book they are holding at that time.  I have played this game with kids in kindergarten through second grade, and they loved it!  I'm sure older kids would enjoy it just as much, but be sure to select a book and prizes that are age-appropriate.


Snack:  Krispie Kisses.  


I found this YouTube video that shows how to make a giant Hershey's Kiss using Rice Krispies cereal.  

I have made smaller Krispie Kisses for classroom treats.  Instead of using a large funnel as shown in the video, I selected a funnel that is 3.5" wide.  I also do not cover the kisses in melted chocolate, though that sounds divine!  When I have combined a 1 stick of butter, a 10 oz bag of mini marshmallows, and about 12 oz of Rice Krispies, the recipe yielded about 16, 3.5" kisses.  I spray my wooden spoon and my hands with cooking spray to make the process a little easier.  You have to work quickly because you don't want the warm mixture to cool before you form all your kisses.  Once the mixture has been packed in the funnel, I immediately turn the kiss out onto a cooling rack on my kitchen counter.  I do not put them in the fridge as is shown on the video. While the kisses are cooling, I cut an 8"x8" square of foil for each kiss.  I spray the foil with cooking spray just to be on the safe side.  I wait until the kisses are completely cooled before wrapping them in foil.  I store them in an airtight container until the party.  This is a great Valentine's Day party treat because the kids can take the Krispie Kiss home quite easily if they choose not to eat it at the party. 

Happy Valentine's Day!  Thank you for reading.

Monday, February 9, 2015

Sample Meeting for Blended Troop of Brownies and Juniors

If you have read this blog in the past, you may recall that this is our first year as a blended troop with Brownies and Juniors.  In the five years I've served as a Girl Scout troop leader, I have often wondered how leaders of blended troops juggle girls of different ages within the same troop?  How did they plan meetings to help satisfy steps for various badges at different levels?  I will admit the planning process can be overwhelming at times even for a troop that is not blended.  It is frustrating and disappointing for both leaders and girls when the plans do not go as anticipated.  In this post, I will outline the agenda for a recent meeting during which our plans did go as anticipated.

Last Wednesday, we decided to make dog toys to donate to a local animal shelter.  We were going to visit the shelter during the second half of our meeting.  The day before our meeting, I discovered we weren't able to visit the shelter because the lobby and bathrooms were being remodeled.  The volunteers at the shelter were unable to accommodate groups and offered to reschedule our visit.  I scrambled to prepare short projects and activities that would fill the 90 minutes we would spend together.  

Once the girls had left the meeting that evening, I decided it actually ended up being, in my opinion, the "perfect meeting."  I thought I would share the agenda here.  

4:15pm   Girls arrive.  
              Kapers assigned.  
              Recite Girl Scout Promise.  
              Sing Girl Scout Law song.
              Share:  Review Troop Rules.  We had a new girl join our troop in 
                         January.  The other leaders and I decided we should review our 
                         troop rules for everyone's benefit.  The girls each had an 
                         opportunity to share one rule for our troop, and we
                         leaders chimed in as well.
               Troop Business:  With Cookie Booth sales coming up in March, our 
                                        Cookie Mom asked the girls to vote on a few 
                                        important details.

4:45pm   Service Project:  T-shirt Dog Toys

5:00pm   Craft:  Metal Washer Necklaces


The Juniors are working on their Jeweler badge.  Step 2 of this badge is "Make Jewelry with Metal."  The Brownies and Juniors made metal washer necklaces during the meeting.  After considering several different ways to decorate the 1.25" diameter washers, I decided we would use scrapbook paper and Mod Podge. There are a million tutorials and blog posts available online, describing how to make washer necklaces. Here's how our girls made their necklaces:
  • Prior to the meeting, I grabbed a scrap piece of paper.  I could have easily traced the washer with a pencil on the reverse side of the paper before cutting it out with scissors, but I decided to use my Cricut.  I chose the Simply Sweet cartridge to cut out a 1.25" circle.  I saved the negative part of the paper square for the girls to use as a template during the meeting.  I flipped the circle over, placed the washer on top and lined up the edges, and traced the inside circle onto the paper.  I used a standard hole punch to cut the hole in the middle of the circle.
  • During the meeting, the girls chose a patterned piece of paper.  I helped them use the paper template to decide which part of the pattern they would like for their necklaces.  We cut the circles, and the girls cut out the middle hole as described above.
  • They used paint brushes to apply Mod Podge to one side of the metal washer.  They covered the washer with the paper circle, making sure to align the edges of the paper with the edges of the washer.  They applied another coat of Mod Podge.  
  • I came across some very small letter beads that had been given to me by a family member years ago.  I invited the girls to use these letters on their necklaces.  Some of the girls chose to write "love," "bff," or their names.  We dabbed a little more Mod Podge around each of the letters, hoping they would dry securely.  A hairdryer was used to help with the drying process.  We let the necklaces dry completely as we continued with the meeting.  Before the girls left, we finished their necklaces.  They chose to use a ribbon, yarn, or parachute cord we had remaining from past projects.  We tied a cow hitch (knot) by making a loop in the middle of the ribbon and threading the loop through the middle hole of the washer.  We took the two ends of the ribbon and passed them through the loop, pulling the ends to tighten the hitch on the washer.  The girls were familiar with this knot because they used them when they made macrame bracelets last month. 

5:20pm   Morse Code.
Step 2 for the Junior Detective badge is "Communicate in Code."  My husband and I recently started watching Downton Abbey.  In the first minute of the first episode of the first season, I saw characters using Morse Code to relay the shocking message about the sinking of the Titanic.  Before the meeting, I cued up the clip so the girls could see Morse Code in action.   

One of our co-leaders shared this worksheet she had come across when preparing a homeschool lesson for her daughters:  

http://www.magictreehouse.com/teachersclub/resource_center/pdfs/17-save-our-ship.pdf 

I printed copies of the worksheets.  Our girls used the Morse Code key on the worksheet to decipher the message to the captain of the Titanic.


During this portion of the meeting, we had some time to work on a handwriting activity.  Step 4 of the Junior Detective badge is "Try Out Detective Science."  I remembered using a book called Love Your Handwriting by Heidi Swapp when I was into writing titles for my scrapbook pages.  I modified one of Heidi's activities for our girls to work on during this meeting.  The girls played with their handwriting by writing the word trefoil in various ways.  Once they had completed the worksheet, they exchanged papers and examined the similarities and differences in their handwriting.


5:45pm   Braille.  
In this post, I described how our Brownies and Juniors learned about Braille.  During this meeting, they were able to complete some steps for the Brownie Senses badge and the Junior Detectives badge.

6:00pm   Closing.  Our girls love to end the meeting by singing "Make New Friends" and doing the friendship squeeze.

Please note that we don't always incorporate each of these components into every meeting.  It happened to work out this time, so I thought it was worth sharing on this blog.  Thank you for reading!

Craft: Braille Name Tag

The Brownies in our troop are currently working on their Senses badge.  Step 5 is "Touch and Feel."  When our older girls completed Step 5 to earn their Senses badge, they created a "feel wheel."  I emailed the families prior to the meeting and assigned each girl a different texture like bumpy, furry, hard, sticky, smooth, and rough.  The girls were asked to find an item from home that felt like their assigned texture.  They each brought that item to the meeting to share with the other girls in the troop. 

Now that we have another group of Brownies, I wanted them to try something different to complete Step 5 for the Senses badge.  One of the alternative choices for Step 5 provided in the list of badge requirements encourages the girls to learn about Braille.  They are asked to use the Braille alphabet to figure out how to write their names in Braille.  

For the past year or so, I have had a part-time job as an assistant to an author.  I have accompanied her to radio interviews that happen to be recorded at the Cincinnati Association for the Blind.  Knowing our girls would be learning about Braille, I was able to talk with a couple people while waiting for the author to finish the interview.  They offered some printed information for me to take back to the girls, including cards with both the Braille alphabet and numbers.  They also gave me a Braille edition of an issue of Reader's Digest.  


I decided it would be fun to have the girls make Braille name tags during one of our meetings.  We also had the Junior Girl Scouts in the troop make them because I had plans to use the name tags in a future activity.  

Using my resources wisely, I found some paper scraps among my scrapbooking supplies and cut strips for the name tags.  I measured the strips 1.5" high, and I allowed about 1.5" for each letter in the first name.  For example, a name tag strip for "Laurie" would measure 1.5" high by about 9" wide.  Referring to the Braille alphabet, I drew two rows of six, small, blank dots for each letter in the name.  I included one dot on the bottom left of the first letter to indicate a capital letter.  I darkened in the dots that corresponded to each letter in the name for this picture.  The girls should be able to look at the alphabet and darken the appropriate circles themselves.  I purchased a package of 4mm multicolored rhinestones from Hobby Lobby when they were 50% off, of course!  The girls glued the gems on the name tag, using either tacky glue or Elmer's glue.  Most of the girls decided to use one color rhinestone per letter.


This was a relatively easy and inexpensive craft.  Even if your Girl Scouts are not working on the Senses badge, this craft could easily be tied into other programs.  Our Junior Girl Scouts are working on the Detective badge.  Step 2 is "Communicate in Code," and learning about Braille satisfies this step.  Additionally, Step 1 for the Detective Badge is to "Practice the Power of Observation."  As we talked about Braille, we discussed the ways blind people can be observant even though they can't see and how those ways are similar and different from observation skills used by people without impaired sight. Years ago, we had an Everybody Counts program for our girls.  Braille name tags would have been a fun craft to include in our agenda.  Next time!

Please check back to see how these name tags will be used in our Self Esteem Workshop planned for the beginning of March. Thank you for reading!

Service Project: T-shirt Dog Toys

One of the girls in our troop is very outspoken about her love for animals.  Any time we ask for service project ideas, she asks to do something for our local animal shelter.  She told the troop that she wanted to incorporate volunteer work for the animal shelter into her 9th birthday party, but she was told she has to be a teenager to volunteer.  In the past, we have done projects to help our our local League for Animal Welfare, but I wanted to make sure we planned another service project to benefit the shelter this year.

Over the summer, my daughters read the May/June 2014 issue of American Girl Magazine.  They came across several projects for dogs and cats made from old t-shirts.  What a great way for girls to use their resources wisely!  While out of school for the summer, my daughters asked to make a pet bed out of a sink mat and old t-shirts.  I posted about that experience here.  The girls in the troop decided it would be fun to make dog toys out of those old t-shirts.  Additionally, this service project satisfied Step 4 "Make a Pet Feel Loved" for the Brownie Pets badge.

One of the other troop leaders offered to prepare the t-shirts since she happened to have a pile of t-shirts that she wanted to use or donate.  Upon doing an online search for instructions, we had difficulty finding a tutorial or decent set of instructions for this project.  I located our copy of that May/June issue of American Girl Magazine, and modifying those instructions, I decided to post how we made dog toys out of old t-shirts.

To prepare the t-shirts:
Lay t-shirt out on table.  Use scissors to cut 
across the shirt below the arms.  The collar 
and sleeves will not be used in this project.

 Use scissors to cut off the bottom hem of the t-shirt.  
Save this strip to use as a tie to finish the dog toy.

 Use scissors to cut up the side seams of the t-shirt.
 
 Use scissors to cut strips every 1.5" to 2".  

Our co-leader started by cutting strips the width of the t-shirt (about 16" for an adult t-shirt).  As she worked, she found it was easier to begin the cut with scissors, and then she ripped the shirt the rest of the way.  Some of the strips may have been 1.5" wide while others may have been 2" wide.  The variance in the width of the strips did not affect the finished product.  As I've mentioned in previous posts, our troop is comprised of second and fourth graders.  Though these girls could have cut and/or ripped the t-shirt strips on their own, we decided to have the strips ready for them.

To make the dog toy:

Choose 9 t-shirt strips and tie them together.  The issue of American Girl magazine mentioned above says to tie the strips together in a knot, leaving a 1" tail.  We used an extra strip of t-shirt to tie off the top of the dog toy.  The hem strips that were saved when preparing the strips worked well for this step.  We wrapped the 9 strips with a hem strip and tied a double knot on the front side of the dog toy.  Then we wrapped the hem strip again and tied a double knot on the back side of the dog toy.
 

The American Girl magazine suggests separating the t-shirt strips into 3 sections (3 strands per section) and then braiding them together.  We separated the strips into 3 sections (3 strands per section) and braided each of the 3 sections individually before braiding all 3 sections together. The magazine suggests tying the strands in a knot when there are a few inches of t-shirt left.  We used the hem strip to tie off the dog toy as described in the step above.


We had the girls work in pairs.  One girl held the end of the dog toy while her partner braided the strands.  They worked together to finish one dog toy.  Then they switched positions and the worked on another dog toy.  The finished dog toys look great!


WARNING:  The magazine strongly suggests readers be sure to supervise pets when they play with these toys.  They advise readers to throw the dog toy away if it starts to shred or fall apart.  This warning definitely applies to the dog toys we made since we did not tie the strands in knots but used an additional t-shirt strip to secure the strand on both ends.

We hoped to stop by the animal shelter during the last part of this meeting.  That didn't work out, so we plan to stop by the shelter at the end of our next meeting to deliver our donations.  Thank you for reading!
Tuesday, February 3, 2015

Macrame Bracelets

Several months ago, we started working on macrame bracelets.  Unfortunately, we had some difficulty and chose to set the project aside until we did some additional research.  You can read about our experience hereBy learning to macrame, our Brownies would satisfy Step 5 Enjoy Girl Scout Traditions for the Girl Scout Way badge.  At the same time, our Juniors would complete Step 4 Create Jewelry Inspired by Another Culture for the Jeweler Badge

This year we have nine girls in our troop:  six Juniors and three Brownies.  These girls are between the ages of seven and ten.  I wanted to find a video that would show us how to make macrame bracelets without having to use a flame to join cords together.  After watching portions of countless (and often complicated) tutorials on YouTube, I came across a video I knew would provide the best instructions for our group. You can view this 15-minute video called "How to tie a 2 color paracord bracelet without melting the cords together" here.  Thanks to this video, Macrame Bracelets: Take Two was a success!

Prior to our first attempt at making these bracelets, I had purchased packages of parachute cord (4 different colors, 25 yards each) and clips from a craft store.  I cut two pieces of parachute cord for each girl.  Each piece of cord was two yards long.  A flame was used to melt both ends of every cord.  

MY SUGGESTIONS FOR THIS PROJECT:
  • Anyone who will be helping the girls make these bracelets should watch this video prior to the meeting.  We had three adults and nine girls, and it still took us about 90 minutes to help them all finish their bracelets.
  • Get together with these adults at some point before the meeting to practice   making a macrame bracelet. 
  • Connect your electronic device to a television with a USB cord to allow the girls to see and hear the YouTube instructions clearly.  This also allows you to pause and replay the video as needed.
  • Cut the parachute cord and melt the tips prior to the meeting.  We used a BBQ lighter to singe the ends.  When it was time to finish the bracelets, we found it was easier to light a candle and use its flame.
  • As is mentioned in the video, measure the girls' wrists when they get to the meeting.  Mark the core cords with a Sharpie to show the girls where they should stop the macrame.  For example, if a girl's wrist is 6.5" around, then mark her core cords at 6".  The clip will account for the rest of the length of the bracelet, assuring a perfect fit.
  • Place a throw pillow on the table and connect the clip to the pillow with a safety pin.  We had four bracelets anchored to one pillow.  We also taped the core cords to the table to hold them tightly in place (though that is not shown in the picture above).
After our meeting, my eight-year-old daughter asked to make another bracelet.  I helped her through the initial and final steps, but she was able to do the majority of it on her own.  We finished her bracelet in about twenty minutes.  Once the girls learned the technique, the process went rather quickly.  They seemed to have fun with the project, and they all agreed to wear their bracelets to school the next day.  I highly recommend referring to this video tutorial if your girls would like to learn to make macrame bracelets.  I hope you find it to be as helpful as I did!  Thank you for reading.